Knowing whether my motorcycle tyres have enough air in them or not is the biggest headache I have while on tour. By the time you get a feeling that it’s low, it’s probably too low that you are risking a puncture at any moment. Even if you have a inflator with you, checking the pressures everyday is tiring.
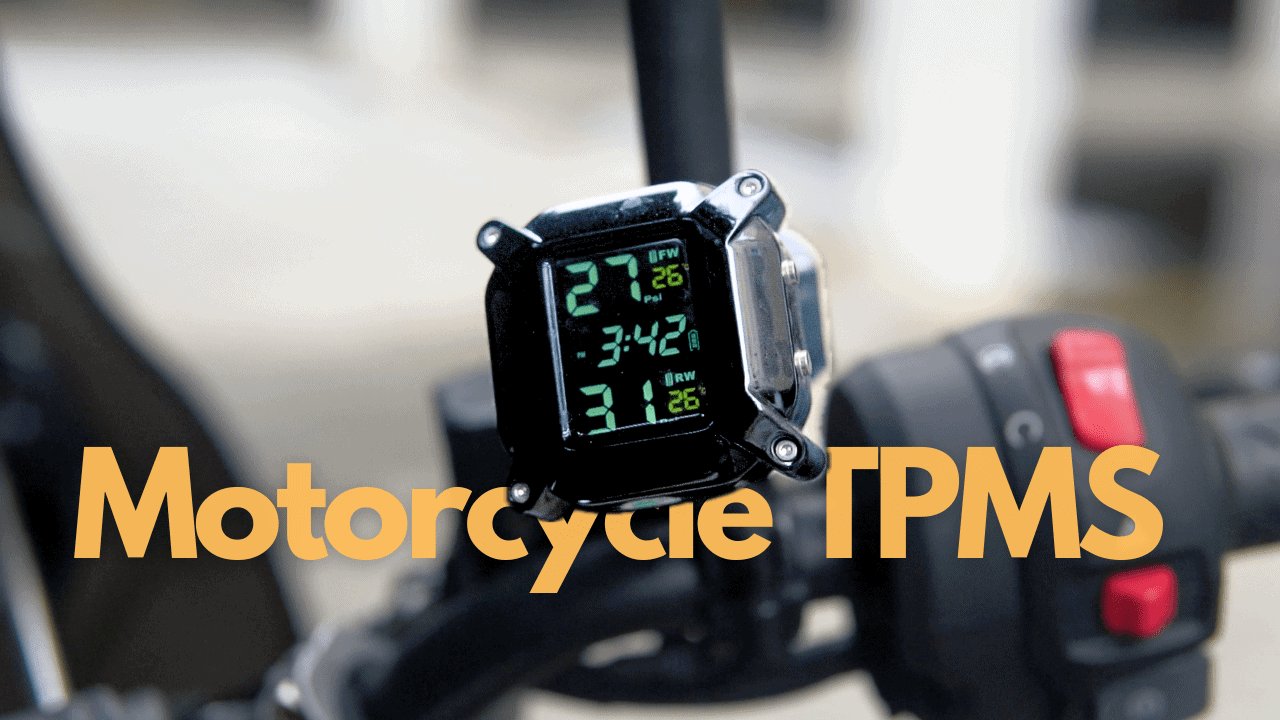
I came to know about the aftermarket Tyre Pressure Monitoring System from a video and decided to give it a try. I ordered the Skyshop c400 TPMS from amazon and boy it’s a game changer. It’s very accurate and has a margin of error of only 1-2 psi after i repeatedly checked the readings with the ones in petrol pumps and with my own inflator.
Features of Skyshop C400 TPMS
Skyshop C400 TPMS comes with two screwable button sized sensors with built in battery that goes on on the nozzle and one screen that shows you the tyre pressure as well as the tyre temperature readings. This screen comes with a screw mount which you can attach on your handle bar. The screen is rechargeable and they say it’ll last 2-3 months in one single charge based on the usage. It’s been 4 months since I charged it last and it still shows full charge.
It has an auto off feature meaning that it’ll get switched off if it doesn’t sense any movement for few minutes and comes back on when it detects motion. I don’t use this feature meaning that i don’t keep it on always. I switch it on only when i want to check the tyre pressure.
The screen module has two switches. One is an on and off switch and the other a toggle switch to adjust the time, unit of measurement and minimum and maximum values to trigger the alarm and so on. The screen has good visibility even at broad daylight. You can adjust the brightness as well.
Concerns
The pressure sensors won’t cause any wheel imbalance issues. I have it installed on both Himalayan and Scrambler400X and I haven’t had any wobbling issues even at high speeds. The only issue is that once you switch on the screen, it’ll show you the previous reading values and you have to wait 3-5 minutes for it to show the current value.
Cost of Skyshop C400 TPMS
Skyshop C400 TPMS costs around 2600 INR and I feel it’s a must have for everyone who does long distance highway touring. Paired with a good electronic tyre inflator, you can take off a huge burden of guessing the tyre pressure and not being able to find help when needed the most.
The Scrambler 400X is an amazing motorcycle. The only thing that prevents it from being the most enjoyable on the highways is the strong wind blast especially after we installed the handlebar risers. That’s when we installed the windshield from Carbon Racing. It’s been 5000 kms since then and here’s my list of pros and cons about it.
Pros of Carbon Racing Windshield for Triumph Scrambler 400X
1. Wind blast reduction
The windshield reduces the windblast considerably esp on the torso ie abdomen and chest. It’s not tall enough to cover your entire body and doesn’t completely eliminate wind buffetting. Don’t expect the Scrambler 400X to become an adventure tourer once you install this windshield. It significantly reduces the windblast upto your shoulder level, if you are some where around 5.5’ like me. This reduces fatigue when you spend long hours on the highway as you don’t need to put much effort to hold on to the bike at higher speeds.
2. Looks
Aesthetics is subjective. Even I didn’t like the look of the windshield on the scrambler at first but it kind of grew on me and now I think the bike looks better with the windshield.
Cons of Carbon Racing Windshield for Triumph Scrambler 400X
1. Wind drag
I’ve noticed a slight increase in the wind drag. This is noticeable only after 120 kph so it’s not a deal breaker IMO.
2. Number plate and high fender position
Since the windshield uses the stock number plate mounting point, you’ll need to go for an aftermarket number plate holder. You also cannot install the high fender accessory that comes from Triumph.
FAQs
1. Does Carbon Racing Windshield for Triumph Scrambler 400X cause any instability?
In theory it may cause instability since it mounts on the handlebar also. But in real world scenarios, I’ve not noticed any instability even at 160 kph on the handle other than the bouncy nature of the suspension.
2. Does it increase ambient temperature around the body?
My Himalayan 411 visor used to cut off so much of the wind buffeting that I used to feel very hot even while riding at high speeds. This windshield doesn’t have that issue since it has a small window that lets enough air to your body to keep it cool.
3. Does Carbon Racing Windshield for Triumph Scrambler 400X hinder visibility?
Absolutely not. If you are someone not used to riding with a windshield, you might take some time to get used to it but it doesn’t hinder visibility in any way.
4. Does it transmit vibration to the handlebar?
No. I’ve not noticed any increase in vibration or buzz in the handle bar after I installed the windshield
So in conclusion, I thought the Carbon Racing windshield is a good product that helps reduce wind blast on the Scrambler 400x to a great extent. I’d recommend it to everyone who’s primarily into touring on the Scrambler.
The best and the most value for money mod I’ve done to my Himalayan 411 so far – Aluminium Rims. Here’s why.
After test riding the new Himalayan 450 and deciding to stick with my 411, I thought of putting in more money to improve Nino, my Himalayan. By now I had already installed performance mods like the BMC air filter, PowerRage exhaust, NGK iridium sparks, FuelX and the TEC cam shaft. I had made up my mind that anything that I add from now on would give me diminishing returns for the money spent and so I was cautious on what I spend next.
By this time I had come back from my trip to Rajasthan where in I suffered punctures twice. So next thing I was looking for tubeless conversion. I consulted Bhushan from TopGear Thumpers in Bangalore and he advised me to get the Aluminium Rims from the new 450 and convert it to tubeless as the stock steel rims fail fairly quickly in tubeless conversion.
So I got a pair of tubeless rims from RE and Bhushan converted the rear to tubeless and put a KTM 390 ADVs tyre profile Reise TourR to fit the new rear rim. Although I knew the rims were lighter, I wasn’t expecting much difference in anything. But the moment I took it out of the garage for a spin, my mind was blown!
The Aluminium rims make a hell lot of difference to the 411s handling. The bike feels a hell of lot lighter as soon as it starts moving, it becomes very flickable and easy to ride. It now rides more like an Xpulse. The initial pickup also improved owing to the reduction in the unsprung mass in the rear.
The bike felt so different in handling that I had to unlearn my 3 years of muscle memory in riding Nino and start learning the new and completely different feel of handling by riding slowly and steadily for a 1000 km at least. The bike is so damn fun to ride now. So responsive, so quick to manoeuvre and flick around the city traffic and on gravel road. On the highways at higher speeds, it’s still stable owing to the gyroscopic effect of the 21 inch front wheel but easily and effortlessly flickable when you want to quickly change lanes or overtake.
So far I haven’t noticed any cons to aluminium rims or the tubeless conversion using the way2speed solution. I installed a TPMS to monitor the air pressure and in the last 1000kms, it has dropped just 1 psi!.
Are the Aluminium Rims a value for money modification for the Himalayan 411?
Absolutely. I’d suggest every Himalayan 411 owner who’s not planning to upgrade their bikes for the next 2-3 years to swap their rims from the new 450 and you’ll be mind blown. The difference is night and day. Even if you don’t get any other performance mods, it’s fine. You aren’t missing out on anything great. But don’t miss out on these rims. Now take my words with a pinch of salt as this is the most expensive mod as well.
Cost of Aluminium Rims for the Himalayan 411
A pair of aluminium rims cost around 20k INR. Way2Speed conversion for the rear and front costs around 12k. The rear tubeless tyres from MRF or Reise costs around 3.5k for the rear. The Ceat Himalayan 450 front tubeless tyre costs 6.5k. Labour included it’d cost around 42k INR.
But I’d say its worth every rupee spent. Even if you don’t get the tubeless conversion, just get the aluminium rims and you won’t be disappointed. With the tubeless conversion, along with the handling, you’ll have less fear to venture out into the unknown.
Aluminium rims is by far the best mod and the most value for money mod I’ve done for my Himalayan. I’d 100% recommend it. You’ll be surprised what your Himalayan is capable of with those rims.
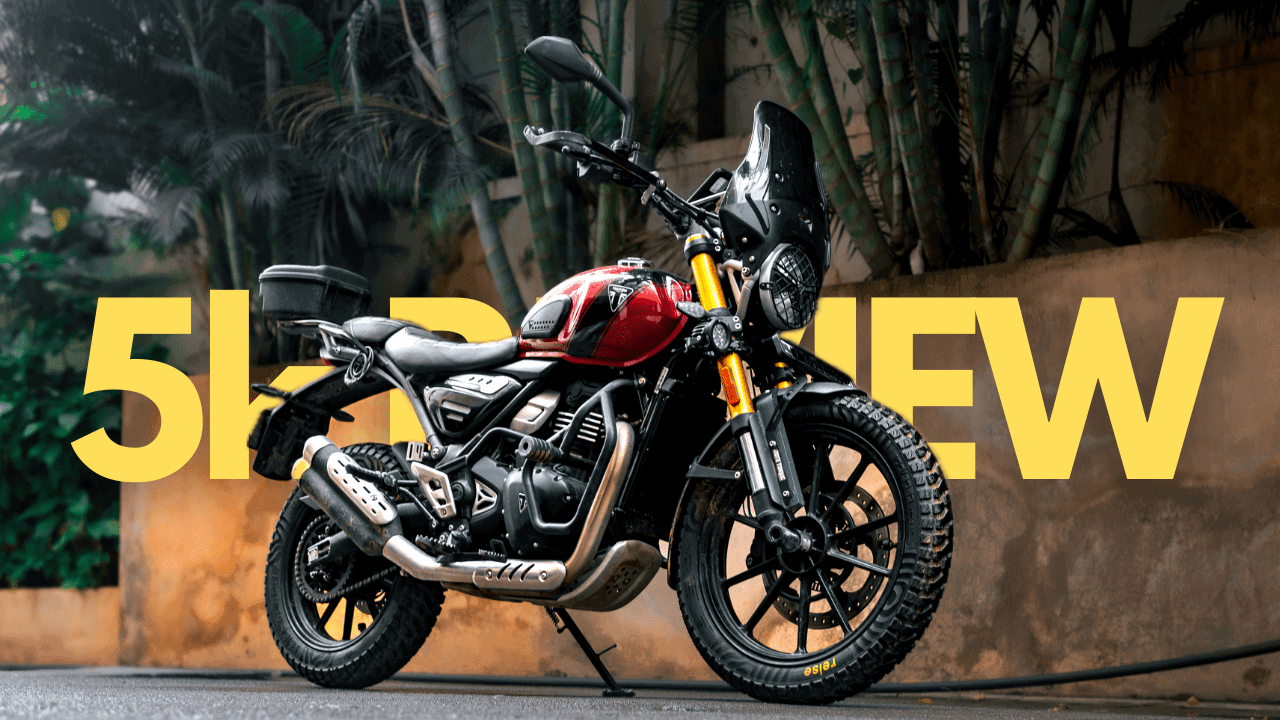
Riding the Triumph Scrambler 400X has been nothing short of pure fun and happiness. Our Scrambler has covered around 5000 km which includes city commutes, two long rides and dirt track practice sessions. Here’s our review on it including the pros and cons and some of the issues we faced with the Triumph Scrambler 400X.
Pros of the Triumph Scrambler 400X
1. Engine and Gearbox Refinement
The most pronounced pro of the Triumph Scrambler 400X is the engine refinement and overall quality of the ride. Coming from a Himalayan 411, the first thing that puts a smile on my face every time I ride this motorcycle is the smoothness and the refinement. The bike feels so smooth to ride both on and off road.
There are minimal vibrations or buzz. The clutch is super light and the gear shifts are very slick and precise. There are no unnecessary noises from any part of the engine as the engine gets heated up. The smoothness doesn’t vary with the engine temperature or other riding conditions and is consistent throughout a city commute or a highway ride.
2. Low End Torque
Coming from a Himalayan 411, it was very easy for me to transition to riding a short stroke motorcycle like the Scrambler 400X. Although it has a shorter gearing ratio, each gear provided ample amount of torque to chug along any trail even at 2k rpm. The bike hardly stalls and the tractability is amazing for a lazy ride on the highway or on the off road trails.
The chugyy nature of the engine is very helpful for a beginner or someone used to torquey engines as you don’t need to rev up the engine to make use of the higher capacity like its competitors. On the other side, it’s so easy and fun to spin the rear wheel with just a slight twist of the throttle with the Traction Control off right from2k RPM on the dirt track.
3. Power Delivery
You’d expect for a torquey engine to compromise on power but the Scrambler is quick and fast! From around 3500 rpm, the bike picks up on power, accelerates like a bullet and reaches a top speed of 170 kph. The only thing that slows you down is the strong wind blast at those high speeds.
The throttle response is almost instantaneous and that makes the bike so peppy and fun to ride. The command over the responsive throttle gives you a lot of confidence in manoeuvering the motorcycle during quick overtakes on the highway. I’m so addicted to the power delivery of the Scrambler 400X. It’ll take some time to get used to the sensitive throttle but once you get used to it, you’ll have a lot of fun with it.
4. Suspension
The suspension is one of the best in class. Both the rear and front are so beautifully tuned that it absorbs all the undulations on the gravel road and just glides through pot holes. On the highways its stiff enough to have a planted feel even at 160 kmph. It doesn’t wobble or bounce over a small hiccup at higher speeds. The dual nature of the suspension – the plush cushiony feel on the dirt and stiff feel on the road makes it a perfect all rounder ready to tackle any terrain.
Both the front and rear are so well in sync that the bike feels like one unit and it gives better control over all kinds of terrain you ride on. Because the suspension travel is less than it’s adventure counterparts, you might end up bottoming out the rear suspension on hard jumps like I did. Going up on the preload solves that problem to an extent.
5. Exhaust Note
The stock exhaust note of the Scrambler 400X is very pleasing to the ears. It’s not loud but it’s bassy and throaty and has a nice aggressive grunt when you open up the throttle. I had to go for an aftermarket exhaust on my Himalayan to achieve a similar sound.
6. Build Quality
The build quality of the Scrambler 400X is exceptional for the price. Every part and screw of the bike looks much more premium than its competitors. We did a PPF coating on the glossy areas of the bike. After a dirty ride, we just wipe it with a microfibre cloth and it looks brand new. Everywhere we park, people gather around it to have a look. It sure catches a lot of attention on the road. We feel proud in owning such a premium looking motorcycle especially when it carries the name of a brand that makes motorcycles like the Tigers and Rockets.
The build quality of the parts are also so good that even after 2-3 falls, apart from minor scratches on the MX hand guards and the engine guards, none of the other parts have taken a hit. The handlebar, foot pegs and frame has held strong on off road trail rides. Just the clutch level and gear lever got bend once and we replaced it from the service centre.
7. Low Maintenance Cost
Premium bikes almost always comes with premium service cost. I expected the same for the Scrambler. But surprisingly, a service almost costs same as my Himalayan. The first service cost around 2.2k INR which included engine oil change. Also the parts are also cheap. The gear lever and clutch lever just costs under 200 INR each and the handlebar around 700 INR.
Moreover the service interval duration is 16000kms! So I’m sure the overall service cost of the bike will sit at a much lower rate than my Himalayan which requires servicing every 5000kms! Anyways I’d suggest you to take the bike to the service centre every 5000km for a thorough checkup and for top up of the oils and coolant.
8. Service Quality
Speaking of service, our experience with the service centre is top notch. I’ve heard mixed reviews about Triumph’s service but I think the overall experience largely depends on the dealerships. There are dealerships in Bangalore that offer the opposite spectrum of service quality.
Luckily we chose the better one and they have helped us very promptly in fixing certain issues along the way. The customer dealings and communication, quick redressal of the issue, quality of the labour work and availability of the parts have been very satisfactory.
Cons of the Triumph Scrambler 400X
1. Brakes
The bite and stopping power of the brakes are quite weak for a motorcycle of such power. Even though Triumph has intentionally given organic pads instead of the sintered ones on the Speed 400, I feel they should’ve given the customers an option before delivery of the bike. During the first service, they changed the brake lever and switched to the sintered pads from Speed 400 after which the bite on the front brake has significantly improved.
2. Tyres
The MRF tyres that come with the bike are more road biased. It’s a hard compound tyre and hence the wet grip is poor. I’ve not had any major skidding incident since the ABS and traction control does a great job on that front but ABS kicks in too frequently because of the tyre. I had the same issue with MRF tyres on the Himalayan as well. We will switch over to a more dual purpose tyre from Reise once these starts to wear off.
3. Vibration at 6000 RPM
The engine starts to buzz a bit and feels a little chocked at 6000rpm. This is a little annoying but you’ll quickly get used to it. The only solution is to stay below or push past 6000 rpm and its starts getting smooth again. It’s annoying because in 6th gear, bike hits 110 kmph at 6000 rpm. So cruising at 100 or 120 above is comfortable than around 110. It’s just the character of the engine and you just have to get used to it.
4. Headlight
The headlight visibility is very poor and you will need auxiliary lights or a decent aftermarket headlight for better visibility on the highways.
5. Wind blast
Wind blast is not a con of the bike but this is an issue in general with all Scramblers. Due to its tall and upright stance, the wind blast is quite strong in high speeds. So if touring is your primary use case scenario, get a tall windshield or go for an ADV motorcycle.
6. Ergonomics
The seating and standing positions on the Scrambler and the comfort it offers is a very subjective matter. We were quite uncomfortable with the slight sporty nature of the seated ergonomics. It takes a toll on the lower back and shoulders on the long hauls. This issue was taken care of by the offset handle bar risers from Zana. Know more about the accessories we installed on the Scrambler 400X here.
7. RSA
Triumph’s RSA network is poor but it’s expected since this is the first batch of motorcycles from the Triumph-Bajaj partnership. They offer RSA within a 100km range from the nearest service centre. But what’s disappointing is that it’s not available all the time like how you have from RE. We had an issue where the bike failed to start. I will make a separate video on that issue. Luckily it happened in our apartment parking space where the bike could be kept safe.
The RSA is available only during the office hours. And even when we called them during office hours, they arranged a tow service the following day only. Imagine such a situation happening while on tour. So unless you have an issue in the city premises, I don’t think Triumph’s RSA can be trusted anytime. Hopefully they expand the network and make available RSA round the clock.
Apart from the minor issues we had on the Scrambler 400X, owning and riding the bike has been so much fun and gratifying. If anyone’s in the market looking for a single cylinder do it all bike with top notch quality, just blindly go for the Scrambler 400X. You’ll not be disappointed.
While I was going through some forums related to the Himalayan 411, especially the ones abroad, many have suggested using a 16t front sprocket for Himalayan 411 on the highways. Since my use case scenario is mostly touring and city commute, I decided to try it out.
There are many options available ranging from 450 INR to 3000 INR for a 16t front sprocket for the Himalayan. I decided to go for the cheapest one to try it out first before getting a better one. This 16t front sprocket is from Lone Ranger. I got it for 450 INR but now it’s available for around 350 INR.
Let me get into the Pros and Cons and I’ll explain why I think it’s the cheapest and best mod best suited for touring on the Himalayan 411
Pros of 16t front sprocket for Himalayan 411
1. Tall gear ratios
The 16t front sprocket makes the gear ratios taller. You’ll find the need to shift from 1st to 2nd at 30 kph, 2nd to 3rd at 40 kph, 3rd to 4th at 60 and 4th to 5th at 90 to 100 when you shift gears between the 3k – 4k RPM range. This allows for a more relaxed cruising on the highways and less frequent gear shifts during the city commute.
2. Less stressed engine
Since the gear ratios are taller, the engine sits 200 – 300 RPMs lower at a particular speed when compared to the stock setup. For example when I cruise at 120, the tachometer needle sits right on the 6k mark in the stock setup.
With the 16t front sprocket, while cruising at 120, it sits somewhere between the 5k and 6k mark. So cruising at high speeds with a lesser stressed engine will feel a lot comfortable.
3. Less jerky engine breaking
With this 16t front sprocket, I felt the engine braking got a bit more smoothened or evened out. While cutting the throttle or during downshifts, the bike doesn’t jerk much and smoothly revs to a halt.
4. Better fuel efficiency
Even though I didn’t accurately check the mileage, I felt it improved the mileage by about 2-3 kmpl on the highway and in the city. Maybe it’s mostly because of the engine operating at lower RPMs at all times.
Cons of the 16t front sprocket for Himalayan 411
1. Reduction in low end torque
Increase in the front sprocket teeth will shift the engine’s torque and power to higher RPMs and hence at the lower RPMs, you’ll see a reduction in the usual tractability of the Himalayan. The Himalayan 411’s long stroke engine has enough lower end torque for you to not notice this effect especially on the highways.
But I went back to the stock after I started going to the dirt track and off road trail rides more often. As i kept getting better at riding on the dirt, I was missing that quick acceleration at the low end which will help the wheel spin and break traction. That’s the only reason why I changed it.
2. Slower acceleration
By virtue of the power being shifted to higher RPMs, you’ll feel that the bike is slower and doesn’t accelerate as quickly as the stock configuration. But the loss of acceleration you’ll make up in a slight increase in the top speed and overall relaxed nature of the engine.
Who should get the 16t front sprocket for Himalayan 411?
If you use your 411 primarily for the highways and for some city commute, then this sprocket is going to be very helpful. Engine will feel a lot less stressed, smooth and maybe improve the fuel efficiency too.
But if you do more of aggressive off road trail riding or dirt track riding, then you’ll need that low end tractability to it’s maximum and hence this sprocket will not suit you.
It’s been around 3000 kms since I installed the TEC camshaft for the RE Himalayan 411. Is it any good? Is there any performance improvement? And is it worth the price?
My Himalayan has covered 45k kms. I made few performance upgrades like the air filter, exhaust and fuel X at 30k km. Soon after the 40k km service, I was tempted to install more upgrades persuaded by other YouTubers. Since I had a little extra cash to spare, I ordered the TEC camshaft for Himalayan 411.
TEC is a UK based company and they make performance parts for the Himalayan. They only deliver to limited number of countries. UAE was one among them so I ordered it to a friend of mine in UAE and he brought it to me when he came home for the holidays. It cost me around 18k INR for the cam, it’s delivery and customs charges. Usually it costs more than that but I ordered during the black Friday sale so I got a good deal.
The team at TopGear Thumpers, a RE service centre in Bangalore installed the cam in my bike. Since it didn’t come with any instruction manual, I reached out to them via email and they promptly replied the valve settings and a video on the installation. Post the installation, there was a running in period of 300 and 100 miles after which you needed to change the engine oil and filter before using the cam to its full potential.
Now after thoroughly testing it for more than 3000kms, I have found one advantage, one disadvantage with the cam shaft.
Pros of TEC camshaft for Himalayan 411
The Himalayan used to feel a bit chocked, vibey and quickly running out of power at around 100-110 kmph. It’s comfortable at 100 or you needed to push past 120 to feel a bit relaxed.
This feel of being chocked up is completely gone with the TEC cam. Now the bike accelerates uniformly from 80 – 120 kph easily without any hesitation in between. This is the one and only advantage I felt with the TEC cam. Bike breathes more easy and stays calmer throughout the top end.
Cons of TEC camshaft for Himalayan 411
The only one downside to the TEC for Himalayan 411 Cam is the engine noise. It gives out a clicky tappety noise that makes the engine run a bit louder. It’s annoying at first but you’ll quickly get used to it.
I haven’t noticed any changes in the mileage. It has remained the same for me both in city commute and highway touring.
Performance of TEC camshaft
TEC says that you’ll get an additional 1 bhp increase in power and 1 Nm increase in torque in the stock configuration and upto 5 bhp and 4 Nm of power and torque increase if you have an aftermarket air filter and exhaust. So on paper, my Himalayan should make 30 bhp and 37 Nm of torque with my setup.
But I honestly don’t any feel in increase in power or torque. The top speed is the same and acceleration also is the same. It’s just that the bike feels a lot less stressed at higher RPMs which makes cruising at 120 kmph on my Himalayan a breeze.
Is the TEC camshaft for Himalayan 411 a value for money product?
In my opinion, I don’t think it’s a value for money product as it doesn’t offer a great performance boost for 18k INR. Especially with the stock setup I don’t think it’ll provide any noticeable improvement in performance.
So do I regret buying this? No. The TEC camshaft works better with an aftermarket air filter and exhaust and I happened to have those already in place and my primary use case for my Himalayan is touring. So anything that allows me to cruise on the highway at 120 kph for 10-12 hours makes my life a bit easier on the road and hence I don’t regret getting the TEC cam shaft.
Should you get the TEC Cam?
If you already have a aftermarket free flow air filter and a free flow exhaust installed and preferably with the FuelX also, and if your main purpose of use is long distance highway touring at high speeds, then definitely get the TEC camshaft. For any other setup and use case scenario, I don’t think its a good value for money proposition.
I’d love to know your thoughts and feedback on the TEC camshaft in the comments below. If you have any doubts, feel free to reach out on my socials.
RE Himalayan 411 is not known for its braking capacity. They are soft, lack good bite and often not enough to stop a 200kg motorcycle in a short distance. But so does the Himalayan which doesn’t go very fast and hence stock brakes are usually good enough.
After I installed the performance mods on the Himalayan, the throttle response and acceleration has improved. It’s quicker (not faster) and hence I felt that the stock brakes aren’t adequate enough especially in the city traffic to counteract the quicker throttle response.
I came across two aftermarket solutions to improving the braking performance. These are the EBC sintered pads and Vesrah ceramic brake pads. The sintered ones offer better bite but they eat into your disc rotor.
So i went ahead with the ceramic pads from Vesrah looking for better braking performance. After riding for more than 7000 kms with it, here’s my honest opinion.
Pros of Vesrah Ceramic Brake Pads for Himalayan 411
1. Improved bite
There’s a noticeable but not so significant improvement in the initial bite especially on the front brakes of the Himalayan 411.
2. Better Life
It offers slightly better life than the stock ones on the Himalayan 411.
Cons of Vesrah Ceramic Brake Pads for Himalayan 411
1. Poor fitment
The pads doesn’t fit quite perfectly on the Himalayan and hence there’s annoying break noise for the first 250 – 300 kms . It becomes worse the more you ride it as the heat expands the break and more of it comes in contact with the rear disk continuously. Once it wears off a bit, the noise reduces. Because of this constant friction, it can affect the performance and mileage too.
2. High Cost
Vesrah Ceramic Brake Pads are expensive. For comparison, the stock break pads cost around 100 – 150 INR and Vesrah costs 1300 INR.
Should you buy the Vesrah Ceramic Brake Pads for your Himalayan 411?
The Vesrah ceramic break pads isn’t worth the money you pay for. For the 10x the money you pay for the pads, you are getting around 1.5x the performance. Not even twice the performance. And that too just for the front brake. The rear one is almost same as the stock.
So don’t fall for the review videos on youtube. Save yourself some money and keep the stock pads. Go for all these aftermarket pads only if you are changing the entire braking system of the bike which will be very expensive.
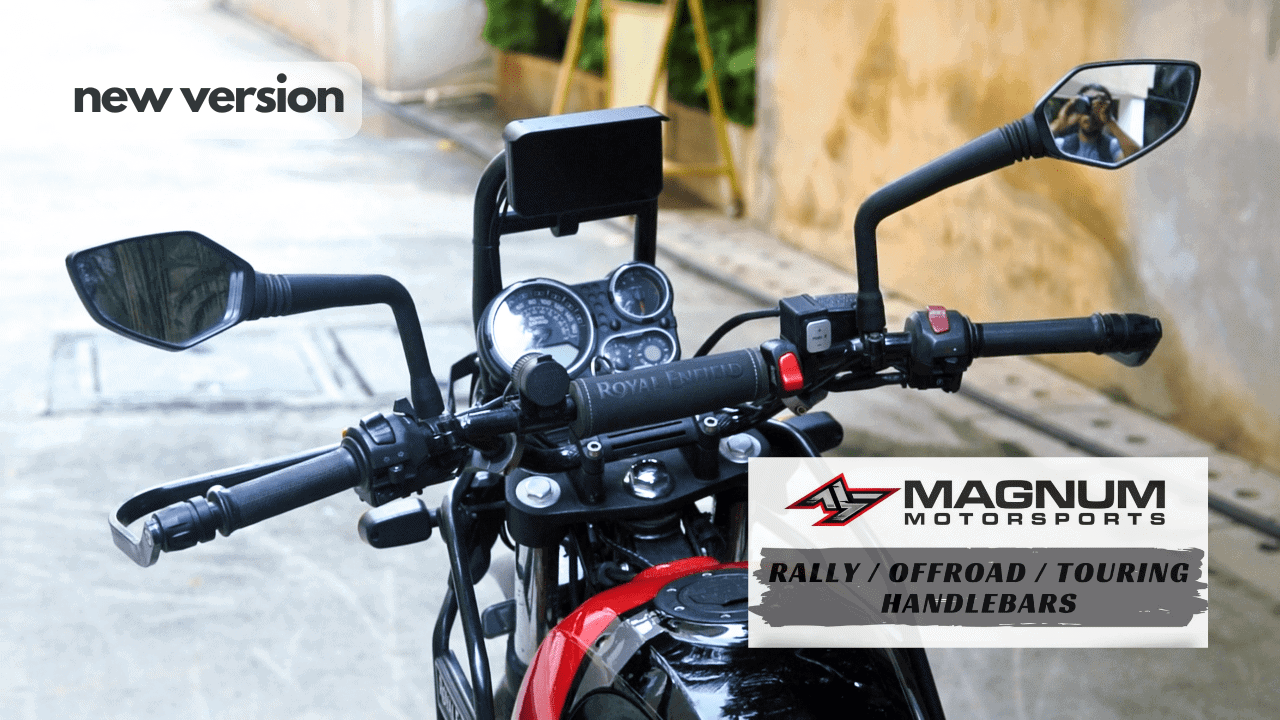
I’ve always used after market handlebars on my Himalayan 411 as I’ve found the stock handlebar to be uncomfortable in terms of ergonomics and too soft to sustain even a small impact. Long story short Magnum Motorsports handlebar for the Himalayan is the best one I’ve used. Here’s why.
On my recent trip to Rann and Rajasthan, I had a crash in Maharashtra and I had to replace my Magnum handlebar with a stock one in Mumbai. I had to complete the entire trip with the stock handlebar and I greatly missed the comfort of the Magnum Motorsports handlebar. So as soon as I reached home , I replaced the stock one with the version 2, the new and improved version of their handlebar. This is the first time I replaced a stock part with an aftermarket one even before it was damaged or worn out. That itself speaks volumes on how good the handlebar is.
Now a disclaimer, I personally know Asad and Saad, the people behind Magnum Motorsports so I maybe a little biased in my opinion. Nevertheless I wouldn’t be making a product review video if I weren’t really convinced that it significantly improves the ride quality.
Pros of Magnum Motorsports Handle bar
1. Build Quality
The handlebar is very strong and sturdy and the overall built quality is very good. The second version is even better as they have taken very good care in detailing the welding. When I had the crash the handlebar didn’t suffer any damages. Unfortunately, the screw that held the knuckle guard broke into two and got stock inside the handlebar. So I had the option of continuing further without the knuckle guard or go for the stock one so that I can fix the knuckle guard.
I didn’t want to take any risk while on tour and that’s why I went with the stock one then. My point being that it doesn’t deform like the stock with any minor impact and definitely it’s stronger than AOM’s handlebar.
2. Improved riding ergonomics
The handlebar is taller and wider than stock but not as wide as the AOM handlebar. So you can easily manoeuvre the bike in city traffic without the handlebar taking up too much of your headroom. The bent angle at the handles is perfect and keeps your arms in a comfortable position even while spending long hours on the saddle.
When going off-road, I can stand completely erect and even be comfortable at the attack stance even though I’ve kept the handlebar a little lower than the normal position to suit my short arms.
3. Compatibility
Magnum Motorsports make handlebars for Himalayan, KTM ADVs and Hero Xpulse. For the Himalayan, it’s perfectly compatible with the stock cables, levers, bar end weights and the knuckle guards. You don’t need to drill any holes to fix anything and it’s an easy swap.
4. Price
Last but not the least is the price. At around 1550 INR, it’s a steal. It’s much cheaper than the other options available in the market and even cheaper than some handle bar risers as well. For the built quality and comfort it gives, it’s a bang for the buck mod for your Himalayan 411.
Cons of Magnum Motorsports Handle bar
1. Increased Buzz – Rectified
In the first version there was a slight increase in the buzz at higher RPMs when compared to the stock one. It’s completely gone in this second version. It’s comparable to the stock handlebar now. I have to appreciate folks at Magnum Motorsports for taking in the feedback, working on it and improving it. So in the second version I couldn’t find any fault.
If you aren’t happy with the stock handlebar of your Himalayan or Xpulse, do give this handlebar a try and I’m very sure you wouldn’t be disappointed. They ship across India. Contact Asad at +91 9880011331 and order yours today. For more details check out @magnummotorsports
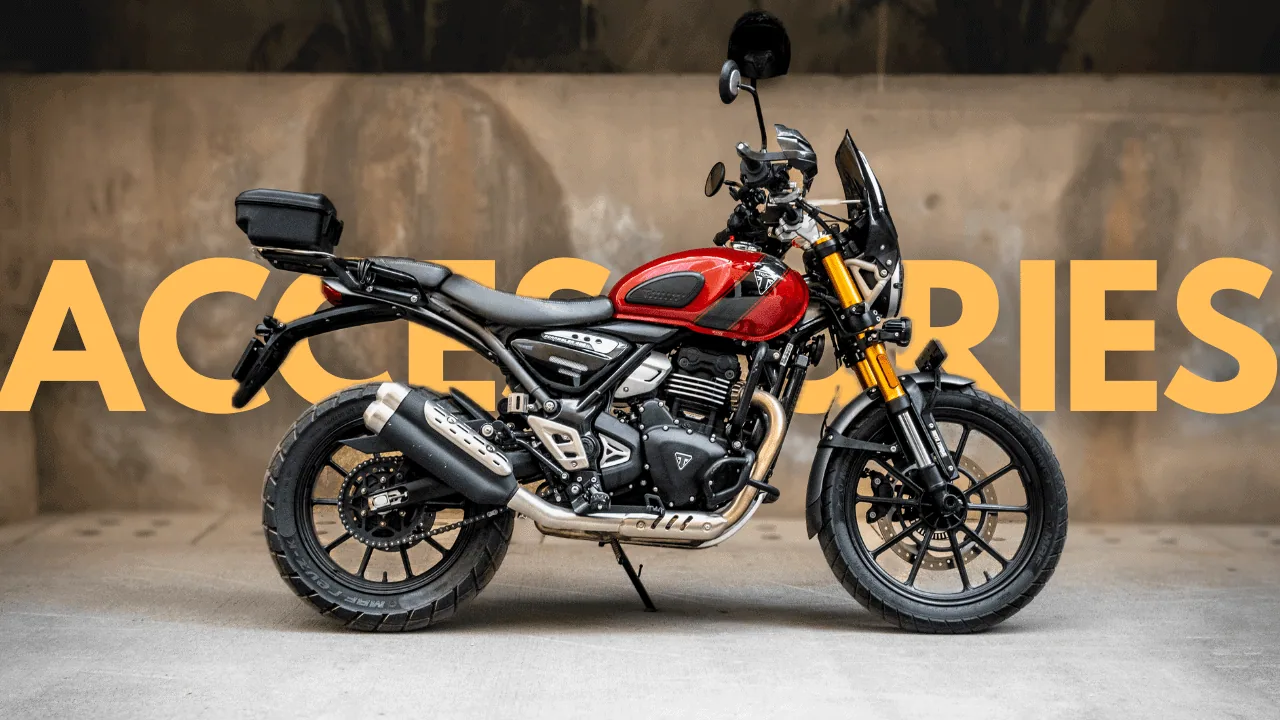
Although the Triumph Scrambler 400X is a nearly complete package for city commutes and short rides, here are a few touring accessories for the Triumph Scrambler 400X that take it up a higher level and make it more comfortable for long-distance touring.
1. Maddog ScoutX Aux Lights
The stock LED headlight is very weak and provides very little visibility on the highways. We installed the Maddog Scout Xaux lights which has a good focus as well as enough throw to light up quite a large area ahead.
There are cheaper alternatives like the HJG lights but we went for the Maddog ones as they have a warranty and better-quality wiring and switches. It costs almost 10k for the lights, clamps, switch and wiring. Now a word of caution. Get it installed by an expert and not by the guys at any accessory store to avoid any wiring issues.
Product Link – https://www.maddog.co.in/product_details/SCX-1
2. Triumph Luggage Tail Rack
We installed the tail rackfrom Triumph itself as they fit perfectly and come with a 2-year warranty. It costs around 2k INR but its worth the price as the build quality is top-notch.
Product Link – https://khivrajtriumph.com/shop/luggage-rack-speed-speed-400-and-scrambler-400-x/
3. Studds Top Box
On the tail rack, we’ve installed Studds’ Vault top box. We are not big fans of those huge hard luggage cases and hence we went for the smallest one. It costs 800 INR. It fits basic necessities for city commutes like rain covers, a pair of gloves, specs, a microfibre towel and so on.
Product Link – https://ridersjunction.com/product/studds-vault-box-matt-black/?gad_source=1&gclid=Cj0KCQjwxeyxBhC7ARIsAC7dS38WtwyipjCGuk0Cv-_B7yAzZOBTDGzpC5l4C5xSHYHHccqxGCrwKUEaAlmKEALw_wcB
4. Triumph Lower Engine Guard
Triumph’s lower engine guardsare so well built that it has survived 3 falls now. It’s very sturdy, protects the engine well, looks well in line with the rest of the frame and comes with a 2-year warranty. The only downside is that it sits close to the frame so once when the rider fell down, the bike fell on her legs and got stuck. So we had to lift the bike to get her leg out.
She escaped unhurt with only a few minor abrasions. To prevent such incidents in the future, we might uninstall this and go for the Mototorque crash guard with the slider so that the rider will have some space to pull their leg out in case of a fall.
Product Link – https://khivrajtriumph.com/shop/lower-engine-bars-speed-400-scrambler-400x/
5. MX Handguard
The stock hand guards that come with the bike are entirely plastic and don’t absorb any impact. It’s mainly installed for aesthetic purposes. During the first fall itself, it broke off and didn’t even protect the clutch lever and we had to get the lever replaced.
We got the MX hand guardinstalled. It’s not an easy fit and it takes a bit of struggle to get it installed but it serves the purpose well. During the second fall, this guard and protected the lever. Only the screw got bent which we got replaced by a local store. MX Handguards without DRL costs around 1500 INR.
Product Link – https://www.motomodz.com/products/mx-handguard-without-drl-for-motorcycle?variant=47199098470698¤cy=INR&utm_medium=product_sync&utm_source=google&utm_content=sag_organic&utm_campaign=sag_organic&gad_source=1&gclid=Cj0KCQjwxeyxBhC7ARIsAC7dS3-MRhMmHTEm3NvMIInYBpQU3xn2dk-bycK1jSpsSKXFNeHqJeoGZQsaAgQfEALw_wcB
6. Pro Taper Gear Boot
Pro Taper’s gear bootprevents marks from forming on the shoes and gives a better grip when shifting gears. It’s a simple but one of the best touring accessories for the Triumph Scrambler 400X.
The Triumph Scrambler 400X hits a top speed of more than 160 kmph and cruises at 120-140 kmph. The only issue you face while cruising at such speeds is the strong wind blast due to the tall stance of the seating position. So to make it more touring-friendly, we’ve installed theCarbon Racing windshield which reduces a lot of wind blast to the chest area and some amount to the face.
Although it takes away the Scrambler look, the functionality it provides makes the Scrambler more touring-friendly. It comes in 2 tones – clear and tinted. It costs around 2600 INR. If you want additional protection, you may install a Pro spec windshield extender on top of this visor.
8. Mototorque Number Plate Holder for Triumph Scrambler 400X
The Carbon Racing windshield is attached to the stock number plate mount in the front. So we had to get the number plate holder from Mototorqueto mount the number plate to a different position. Even if you don’t get the visor, I feel the number plate looks better on the front fender than how it looks on the headlight. It costs around 500 INR.
Product Link – https://mototorque.in/products/triumph-speed-400-number-plate-holder
9. Zana Offset Handle Bar Risers
The stock configuration of the Triumph Scrambler 400X has a sporty stance which is good for city commutes and short rides. However, during the long hauls, we felt uncomfortable in our lower backs and shoulders as we were both short riders.
Zana’s offset handlebar risertook care of that issue. It elevates the handlebar and brings it closer to the rider for a better upright seating position more suited for the highways. The drawback is more windblast but now you know how to take care of that.
Product Link – https://www.zanamotorcycles.com/product/offset-handle-bar-riser-silver–for-triumph-scrambler-400
10. KTM Rear View Mirrors
The stock mirrors of the Triumph Scrambler 400X are good in terms of looks and stability but the field of view is very low. So we are planning to install the KTM 390 ADV mirrors once they come in stock at the service centre near to me. I have been using them on my Himalayan for the last 4 years and they are the best.
11. Bobo BM17H Phone Holder
My iPhone 12 mini’s optical image stabiliser got ruined by the handlebar vibrations during my trip to Rajasthan which rendered the main camera completely useless. It isn’t repairable and replacing the camera module would cost close to 15k INR.
I wasn’t aware of this issue with iPhones and motorcycle mounts and to prevent further damage, we got Bobo’s BM17H with the vibration dampener to protect the iPhone’s camera. Till now Yash’s phone hasn’t suffered any damage but I’ve heard from some users that even these holders with vibration dampeners aren’t enough to protect the OIS. So I recommend getting a normal holder like a Bobo BM4 and a secondary cheap Android phone just for navigation purposes.
Product Link – https://amzn.to/4b8EMsc
12. Mototorque Brake Fluid Reservoir Guard
Mototorque’s brake fluid reservoir guardis of good quality and looks aesthetic. An oil reservoir guard is a necessity when you go trail riding to prevent any stones or sharp objects from damaging the reservoir.
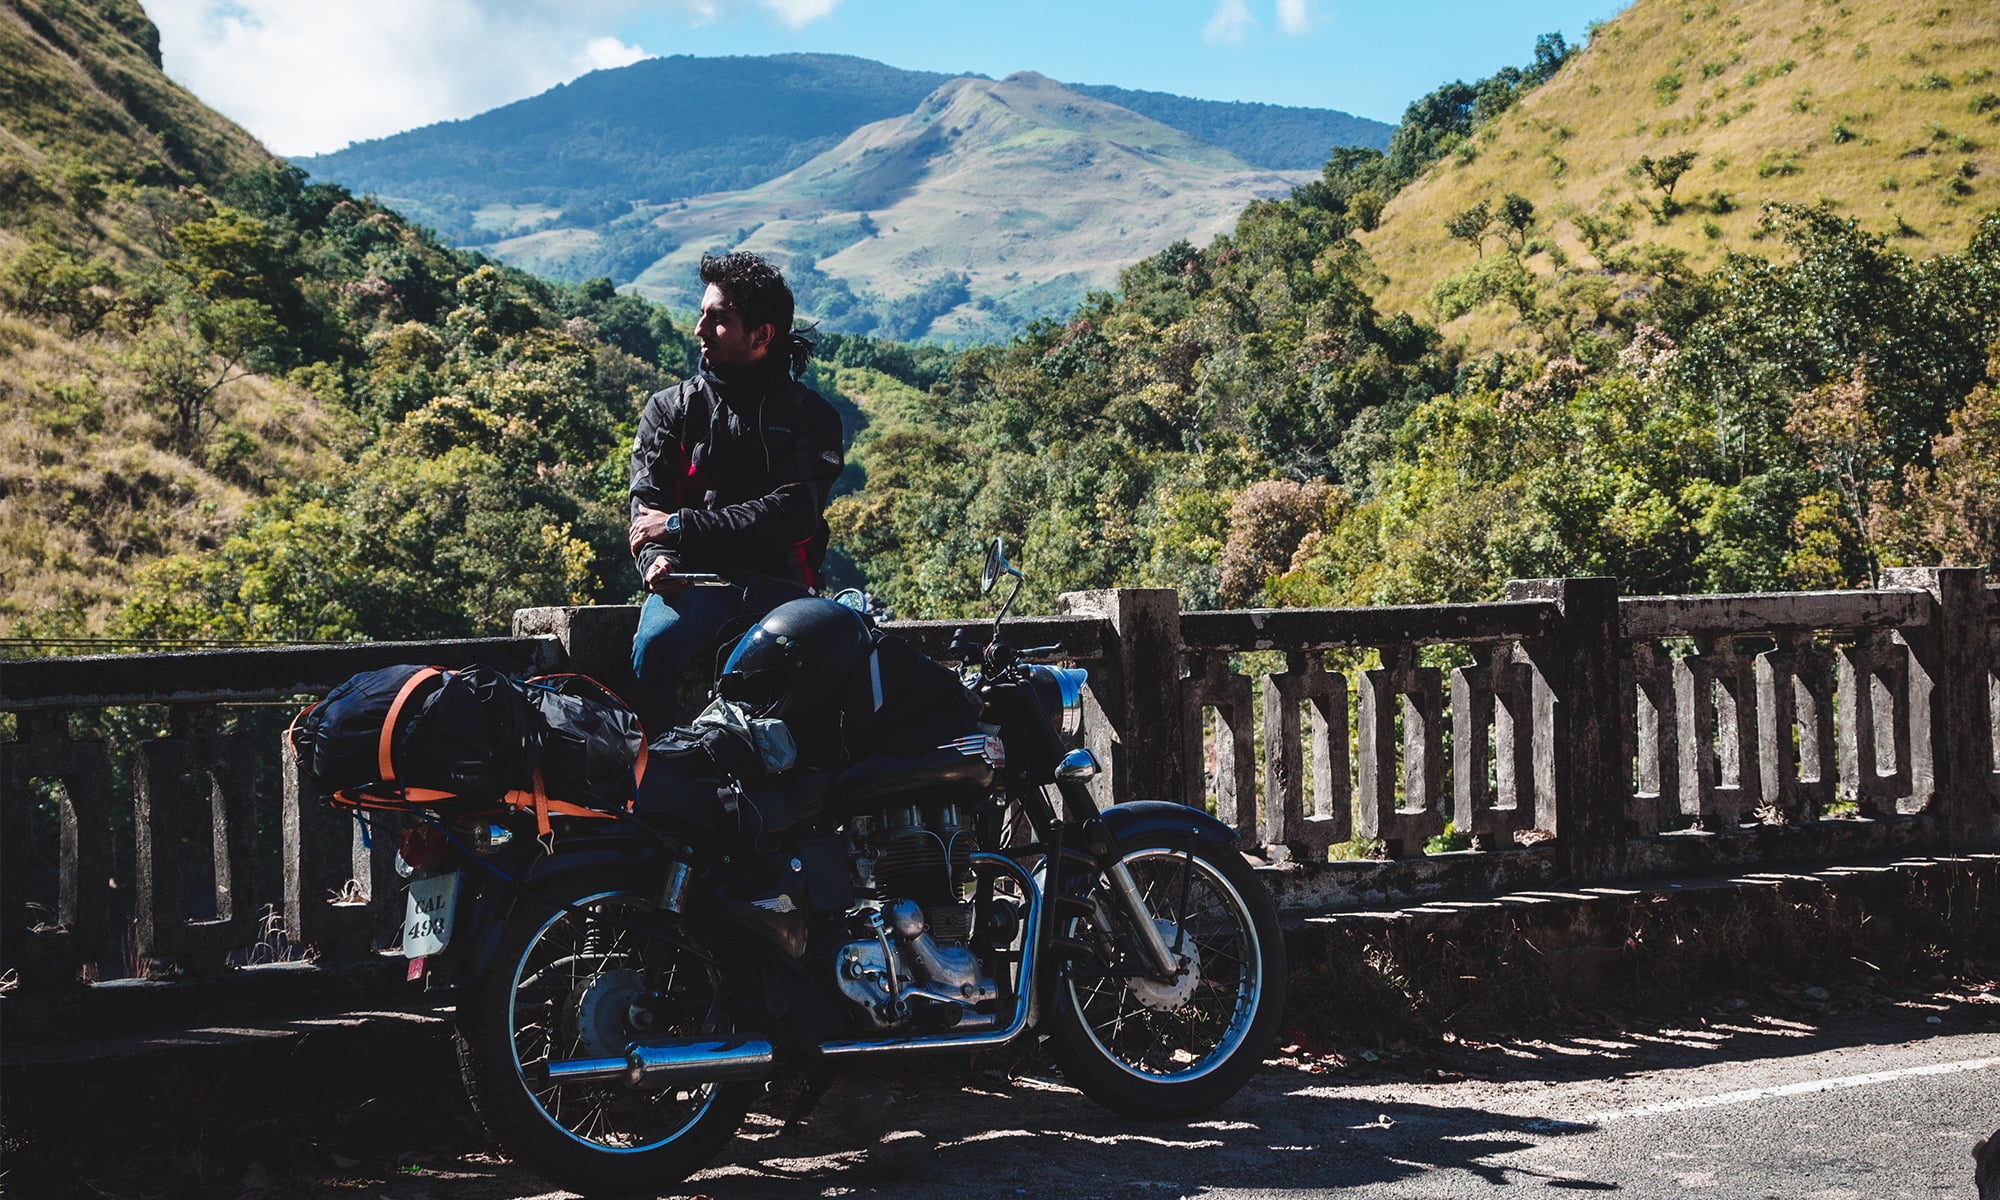
Here’s a list of what to pack for a long motorcycle ride. These are the items I took on my 6000+ km trip to Rann and Rajasthan. I hope you’ll find this information useful.
Clothes
3 Boxer shorts
1 boxer brief
2 full sleeve tees
2 half sleeve quick dry tees
1 Jogger
1 Short
1 Tank top
2 Handkerchief
1 Towel
3 pair socks
Plastic bags
1 Cap
1 Jacket
Eye mask and ear plugs
1 set of thermals
1 pair flip flops
Food items
Whey Protein
Creatine
Peanut butter
Protein bars
Coffee powder
Tea powder
Bread
Dairy whitener
Corn flakes
Cup
Spoon and fork
Scissors and knife
Electric travel kettle
Water bottles – 2 L
Medicines
Medications to treat colds, allergies, respiratory infections, food poisoning and painkillers
Supplements and multivitamins
Odomos
Mosquito repellents
ORS Sachets
Cotton and gauze
Diclo gel
Dettol or savlon
Any regular medications
Toiletries
Toothbrush
Toothpaste
Sunscreen
Trimmers
Lip Balm and moisturiser
Nail trimmers
Shampoo and conditioner
Body wash
Hair serum and oil
Bar soap/washing powder
Comb
Hair bands
Sunglasses
Documents
DL
RC
Insurance
Pollution certificate
Aadhar
Debit cards
Cash
Notebook and pen
Photographs
Written emergency contacts
Electronics
Cameras and lenses
SD Cards
Laptop and SSDs
Action camera, phone, watch and laptop
chargers
Multi-pin
Switchboard
Extension board
Lav and shotgun mics
USB type b and c cables
Power bank
Mouse and headphones
Tripod
Tools and spares
Spanner & Allen key set
Tubes
Bike toolkit
Puncture kit
Chain lube and cleaner
Chain brush and cloth
Brake pads
Fuses
Wiping cloth
Rubber gloves
Spark plug
Air pump
Disc lock
Zip ties
Tyre wrench
I hope you find this information useful. If you feel I missed any essential item, feel free to comment below and I shall add it to the list. Check out the video below if you’d like to see how I packed for my motorcycle trip.
I have also included a PDF checklist that’s free to download and use.