I had previously installed MX hand guards on the Triumph Scrambler 400X and the Himalayan 411. It served the purpose well. The frame was strong and sturdy. However, it was quite large and heavy. And that’s when I came across Acerbis first copy aluminium hand guards and I thought I’ll give it a try.
Now after using these extensively on 3 different motorcycles, here’s my review on it. First the pros.
Acerbis Copy Hand Guards are quite sturdy. It takes a serious fall for it to break but for all the soft falls while you go off roading, these are sufficient enough to protect your levers and hands. It’s not as strong as the MX handguards which bend and not break but it’s definitely durable than the stock plastic ones.
They are brittle enough to break on a strong impact and thereby absorbing the impact. They are not rigid enough to transfer all the impact to your handle bar thereby risking bending the handlebar, top yoke or the forks even.
The only time it broke was during a track practice on my KTM 390 Adventure S. It was quite a bad crash where I ended up breaking the mirror, engine guard slider and the hand guard. Even though the hand guard broke, it didn’t end up injuring me or transfer the forces to the handlebar. That kind of fall has easily easily bend the handlebar on my Himalayan 411 and the Triumph Scrambler 400 X as well with other hand guards but it didn’t do anything to the KTM handlebar with these hand guards.
2. Universal fit
Acerbis copy hand guards are very easy to fit and fits almost all the bikes. Only in the KTM 390 Adventure S I had to use longer screws to fit the stock bar end weights along with the hand guards on handlebar. On the Triumph Scrambler 400X and Himalayan 411, it was a straight fit.
3. Cost
It’s dirt cheap for a hand guard. It costs around 1100 INR from flipkart. So even if you end up breaking it, you’ll not burn a hole in your pocket replacing it. I prefer cheap hand guards like these instead of expensive ones like the Barkbusters.
Cons of Acerbis First Copy Hand Guards
1. Wind Protection
The plastics on these hand guards are small. So if you’re looking primarily for wind protection from these hand guards, then these aren’t for you.
2. Build Quality of Acerbis first copy hand guards
The quality and the finish on the plastic isn’t great. Often it comes with minor scratches or with uneven paint work. But you can’t expect high quality from something that’s just 1000 INR.
All in all Acerbis copy hand guards are good products for the price. It’s nice and sleek, sturdy and fits great. I love them so much that I used in all 3 bikes and currently my KTM 390 Adventure S is running the second set of these hand guards. I love the fact that even if they get damaged, they can be easily replaced as they cost less.
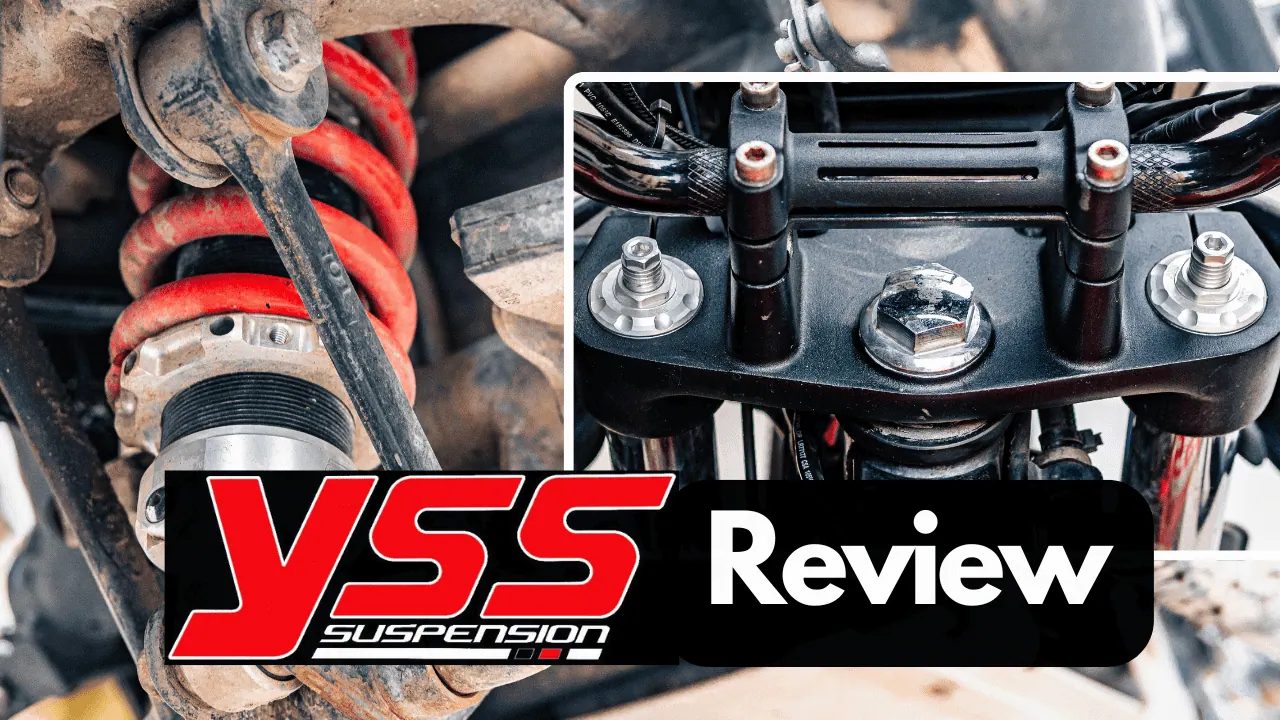
I upgraded my Himalayan 411’s suspension to performance suspension from YSS. And here’s how it performed over 5000kms.
The Himalayan 411 is undoubtedly one of the best motorcycles in it’s class for off road riding. However the suspension seemed to be the weakest link when it comes to pushing the bike to its limits off road. It’s mainly because the OEM suspension is designed to keep comfort and the needs of the general population in mind. For the enthusiast it can be a little too soft.
As I was getting more and more into off road riding, it made sense for me to invest in a good aftermarket suspension and hence I went for the best one available for the Himalayan 411.
The preload adjustability at the rear is not by clicks like the stock but by a screw mechanism. This allows fine tuning and adjusting the preload. You can adjust the rebound in 10 different settings from soft to hard by a click mechanism. The rear suspension also allows height adjustability by 2 stops to increase the seat height if needed.
The front suspension has a linear spring instead of the progressive one like the stock. It has a PD valve which controls the oil flow rate. It comes with preload adjusters. YSS recommends the use of 20W grade oil and I went with the 20W oil from Liqui Moly.
Pros of YSS Suspension for the Himalayan 411
1. Traction
I always thought that comfort is the sole function of suspension. But then I came across few videos from experts which said that a suspension has 2 functions. Comfort and traction in equal proportions. I never understood it until I got the YSS suspension. Once the sag is adjusted to your weight, the traction it provides is insane!
It completely transformed my Himalayan 411 on the dirt. The speed and force at which the suspension compresses when the wheel runs over a undulation gives comfort. And the speed and force at which it rebounds and comes in contact with the ground gives the bike traction to maintain momentum.
The stock did an excellent job at compression. But whenever we tried to pick up the pace on off road, we used to feel that the suspension is compressed and we felt the lack of feedback from the terrain. This made you feel less and less in control when you are going fast over dirt. And eventually you are forced to slow down and keep a pace which is suitable for the suspension to rebound and give enough feedback to be in control.
This is where the YSS suspension shines like a star! The compression and rebound is so much in sync that it gives constant traction, feedback as well as comfort over a wide range of speed. This allows you to pick up momentum on the trails and go amazingly fast over off road terrain.
You’ll notice that the wheels are always in contact to the terrain and this gives it traction. Also the feedback of the terrain from this gives you a sense of control and confidence in handling the bike and keeping up the momentum. You’ll get the confidence and freedom to push it harder and faster over off road terrain. It’s a night and day difference between the stock and YSS in off road terrain.
2. Feedback and control
As a result of improvement in the traction that the YSS provides, the whole bike feels as one unit. With the stock the front and back used to feel in distinct ways over bad roads or off road. The YSS, if dialed in right, feels exactly the same in front and back. When you run over and undulation, you’ll notice the similarity in how the front and back behaves.
In higher speeds the time between the reaction of the front and rear suspension becomes very minimal. As in the front and rear crosses the particular undulation in a fraction of a second. In the stock setting as the front and rear behaves in distinct ways, it used to throw off the balance and traction to a point where you’d have to slow down to regain control.
The YSS setup makes the bike behave like a single unit. So when you hit an undulation at high speeds, you’ll feel almost as if you hit it just once as the rear and front doesn’t behave in 2 separate ways. This keeps the balance and traction in check and gives enormous feedback for you to push the bike to its limits off road.
3. No bounce
The YSS suspension is amazingly comfortable yet steady like a rock! It’s almost too good to be true on how it behaves. At high speeds on the highways or when you take small jumps on the stock suspension, it bounces a couple of times before it settles. You’ll have to slow down and not increase the momentum till if finishes bouncing and settles because you won’t get a sense of control until the suspension settles.
The YSS on the other hand just makes one bounce and it’s back to normal!. It’s that instant. You go over a small elevation at high speed on the highway or on the off road, it elevates and lands and that’s it! No bounce, no wavy feeling, nothing. It’s highly stable and doesn’t require you to slow down to regain control.
All these pros gives a great confidence to pick up speed and skill up going off road. It helps to enjoy the bad terrains the way it is to be enjoyed on a 411. It truly unlocks the potential of the Himalayan 411.
Cons of the YSS suspension for Himalayan 411
1. Firm/Stiff
The YSS is firmer than the stock suspension. At crawling speeds on broken tarmac or off road, the suspension can feel stiff and jittery. This is where stock suspension shines. It is comfortable at these speeds but try to pick up the pace and stock gives up.
But pick up the pace on the YSS, it becomes a flying carpet. So YSS requires a minimum pace for it to perform its best.
2. Rear Adjustability
The linkage system on the Himalayan 411 makes it difficult to adjust the preload and rebound on the suspension. Adjusting the preload can be done to some extent with the lever provided with the suspension but rebound can be done only if you expose the top section of the suspension. So you’ll have to take it to the mechanic every time to adjust the rebound till you get a favorite setting.
Cost of YSS Suspension for Himalayan 411
The front fork kit costs 23k INR and rear suspension costs 33k INR. With installation charges and fork oil it comes close to 59k INR.
Value for money?
Absolutely yes. After the Aluminium rims on the Himalayan 411, I think the YSS suspension is the most value for money modification for the Himalayan 411. It makes the 411 seem to be on steroids when taken off road. The difference in handling and confidence compared to the stock is night and day.
Who is it for?
The YSS suspension isn’t for everybody. If you use your Himalayan primarily for city commute and short highway tours once in a while, then the stock suspension is good enough. It performs great for such use.
But if you’re planning to go more off road, to trails, to dirt tracks and broken roads, then YSS is the right suspension. If you’re looking to up skill yourself to becoming a better dirt rider and you do long stretches of highways at high speeds then you’d come to a point where you’ll feel the stock suspension is slowing you down. That’s when you know you’re ready to experience YSS’s magic.
YSS vs Zedling Suspension for Himalayan 411
I sold my Himalayan 411 before upgrading to the new KTM 390 Adventure S. I sold the YSS unit separately to a friend of mine before selling the bike and I had his Zedling unit exchanged and sold the bike with it. So I got to ride with the Zedling for more than a 1000 kms before selling the bike. It wouldn’t be fair to give a separate review on the Zedling with just a 1000kms experience on it so I’ll include it here.
I got to ride the Zedling on dirt track as well as in city commute. It behaves very similarly to the stock suspension. I would say it’s a mild upgrade to the stock and doesn’t even come close to how the YSS feels and behaves. Many of you would want to upgrade to Zedling as they are much cheaper than the YSS but in my opinion, upgrade to YSS or stick to the stock. To make the stock feel better, adjust the sag on the rear and go with a heavier grade oil on the front.
So all in all YSS Suspension, is a bang for your buck upgrade for your Himalayan 411.
We rode our Triumph Scrambler 400X with Reise TrailR tires and here’s my review on it.
Before heading to Ladakh, we took some dirt track practice sessions in preparation for the trip. That’s when we realised that the stock MRF tires on the Scrambler sucks even for mild trails.
So we thought of trying the TrailR tires from Reise just for the Ladakh trip. These tires did a fantastic job! But it has its flaws too.
Reise TrailR tres are excellent off road. On terrains like dirt, rocks, stones, shallow sand, river crossings and so on, the grip is fantastic. You notice the difference when you make the transition from Tarmac to dirt roads in that you’ll not notice that you’ve actually transitioned the terrain.
Usually you’ll feel the lack of grip when you go to dirt from Tarmac but this tyre doesn’t give you that feeling. It’s that stable. This made riding on dirt roads in Zanskar and LAC so much fun. It’s so much confidence inspiring on dirt.
Only in slushy condition it performs same as any other road tyre as the mud clogs up with grooves. Apart from that, it’s a blast riding off road with these tyres. It’s so much confidence inspiring and makes you think less as the effort from your end needed to control the bike off road is very less.
That doesn’t mean it’ll make up for your lack of skills riding off road so I still recommend off road training and practice before you head to places like Ladakh or in general.
2. Braking Confidence
Usually blocky tires aren’t good when braking hard but surprisingly I felt confident in braking both off road and on road.
Cons of the Reise TrailR
Now Reise markets these tyres as 50:50 tyres but in my opinion these tires aren’t great on road.
1. Stability
The stability on tarmac isn’t good. The bike has a slight wobbly feeling on speeds higher than 80kph.
2. Cornering
Reise TrailR feels very unstable during cornering. It’s expected with knobby tires but these tires feel like knobbies on the road.
3. Constant Hum
It’s expected from blocky tires. There’s a constant buzz that becomes loud as you go faster on road.
4. Reduction in top speed on Reise TrailR
For some reason the bike struggles in terms of being stable at speeds above 100kph on the highway. This isn’t ideal for a bike like the Triumph Scrambler 400X especially on the highways.
Conclusion
The Reise TrailR tires are fantastic off road tires. If you are planing for a Ladakh trip, I’d highly recommend in getting these tires. Even if it’s for one trip, it’s totally worth it. The amount of fun and confidence you can get on the dirt with this is amazing. It’s suitable for Tarmac if you aren’t going at high speeds which is suitable for places like Ladakh.
But if you are planning to use it for touring, then these aren’t for you at all. It can do some city commute and mostly off road but not on the highways for sure. I do not recommend these tires for long distance highway touring. It’s more like a 70/30 tyre I’d say. 70 for off road and 30 for road.
If you are looking for touring on highways and do some trail riding, then you can consider either the Maxxis Maxxplore or the Reise TourR tyres.
Everyone knows the Scrambler 400x headlight sucks. And hence we got the Maddog Scout X auxiliary lights installed and rode around 6000kms with it. Here’s my review on it.
The Maddog Scout X lights are sufficiently bright for a motorcycle. They have a good area of spread and you can adjust the focus as per your liking. They look small but perform big.
I’ve seen people using the Alpha version on bikes which are actually meant for cars and I think they’ll are a bit of an overkill and a hazard to oncoming traffic. Scout X is sufficient to give you confidence to ride in the night.
2. Build Quality
The quality of Maddog products is great. The lights are very sturdy and they can take a beating. The wiring and the switches also feel very premium and sturdy. They are waterproof. We have the switch pro installed which has a on/off indicator as well.
3. Warranty
As far as I know, only Maddog offers warranty for their lights in this price range. Other alternatives like HJG don’t offer warranty. So that’s a plus point from my side.
Cons of the Maddog Scout X
1. Focus
Maddog Scout X lights are more like flood lights and aren’t focused. That’s why I prefer lights like Vaishnu touring headlights. When on the highway, you need a more focused light to see farther distance than a flood light which helps you see the immediate surroundings.
2. Weight
The lights, clamps, wiring and accessories add additional weight on the bike which I’m not a huge fan of. That’s why I prefer replacement headlights over auxiliary lights like the Vaishnu headlights.
Cost of the Maddog Scout X
The Scout X lights along with the switch pro, wiring harness, clamps and labour charge comes up to 10k INR which is value for money considering the build quality and warranty.
For those looking for a good long lasting aux lights for your bike, Scout X is the way to go but I’d recommend replacing the headlight as it saves space and weight on the bike.
A year ago I had stumbled on this product called the Easy brake through a YouTube video. It’s made by pro spec, the same company that makes the Easy ride windshield extension and Easy clutch that I’ve used on my Himalayan, both of which have been extremely useful. So I was curious to try it out.
Easy Brake looks like an unassuming piece of plastic that attaches to your brake pedal. The main function is to provide a larger area of contact when you’re wearing a riding boot and improve the feedback. It also has an extension that allows easy application of the brake when you are standing and riding in off road terrain.
I was very sceptical anbout its application in the real world scenario but I was pleasantly proved wrong. The Easy brake as the name suggests makes it easier to apply the brake and get feedback especially when you are wearing riding boots with think sole. While standing and riding it’s very easy to access the extension for an easy application.
This improvement in feedback and easy access translates to a lot of braking confidence in both highway and off road riding. I got so used to and comfortable with it that as soon as they came up a model for the triumph scrambler 400X as well, I went ahead and got one installed on it. We did the entire Zanskar, Ladakh and Kashmir trip with this and it has proven to be very useful.
On my review on the Vaishnu LED touring headlight, many of you had asked me about the gps setup on the Triumph Scrambler 400X so I thought I’ll make a separate blog on it. Thanks for your interest.
Now to give credit where it’s due, this setup isn’t my original idea. I got inspired from a channel called Chennai Vlogger and he had a similar setup on his scrambler and so i thought I should try it out. And it works!
It’s fairly simple. First I got the windshield and it’s bracket from Triumph itself. It costs around 2.5k INR. I got the windshield a smoke black sticker from a local sticker shop which costs around 300 INR.
Next I got the gps holder for RE Interceptor 650 from Bizen. It attaches to the headlight screw and you can give an additional screw to the windshield bracket so that it sits tight. It costs around 1500 INR
Pros of touring GPS setup for Triumph Scrambler 400X
Now the beauty of the whole setup is that the phone or any gps device for that matter sits right below the line of sight when you’re touring. This makes viewing the map much easier than having in installed anywhere else.
When you wear touring helmets it’s often difficult to tilt your head and keep looking down. I’ve had some close calls in city traffic where I’ve got distracted looking at the navigation. Here when it’s just below the line of sight, you don’t need to tilt your head. Just a glance below and you’ll have the maps for access.
Cons of touring GPS setup for Triumph Scrambler 400X
The only downside to this current setup is that it covers the speedometer a little at the top. I don’t mind that and if it’s matter of concern, use a smaller phone holder or even better, a carplay device.
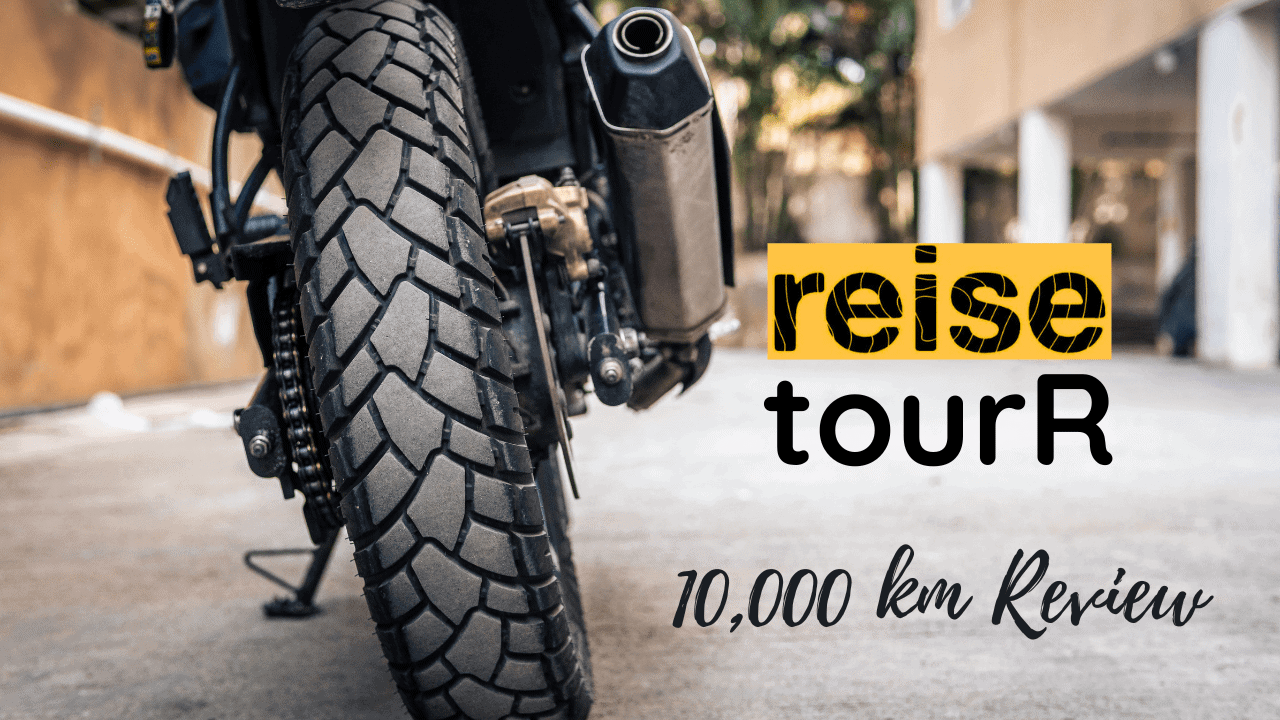
It’s been more than 10000kms since I started using the Reise TourR on my Himalayan 411 and here’s my review on it.
After I changed to aluminium rims on my Himalayan from the new 450 and converted it to tubeless, I was curious to know what’s the hype with Reise tyres. I decided to go for the TourR one since my primary use case is touring.
There’s no tubeless option available for the Himalayan 411 profile and hence I went with KTM Adventures profile which is the closest option available. It’s a 130/80-17 tyre as opposed to the stock 120/90-17.
These tyres offer a good grip off road even though these tyres are more designed for Tarmac. I used this tyre for my Ladakh trip and prior to that I used it for dirt track practice sessions.
What I’ve noticed is the side blocks do a great job in giving good grip when you are cornering on the dirt. The grip on road is decent and is comparable to the stock CEAT on the Himalayan 411.
2. Life
It’s too early to talk about the life but by looking at the tread pattern after 10000kms I’m guessing it’ll give a life more than the CEAT or the Maxxis
Cons of Reise tourR
1. Wet Grip
The wet grip on Tarmac is comparable to the stock CEAT. It good but not great. Even here I’ve noticed the Maxxis Maxxplore to be superior.
2. Braking Confidence
In braking, the TourR is comparable to the stock CEAT. Here too the Maxxis has a slightly better edge. These cons are just compared to Maxxis. But inherently these tyres are do a decent job.
In conclusion the Reise TourR is a decent tyre and is almost comparable to the stock CEAT on the Himalayan 411 in its performance with a slight edge over the CEAT in off road terrain and on life.
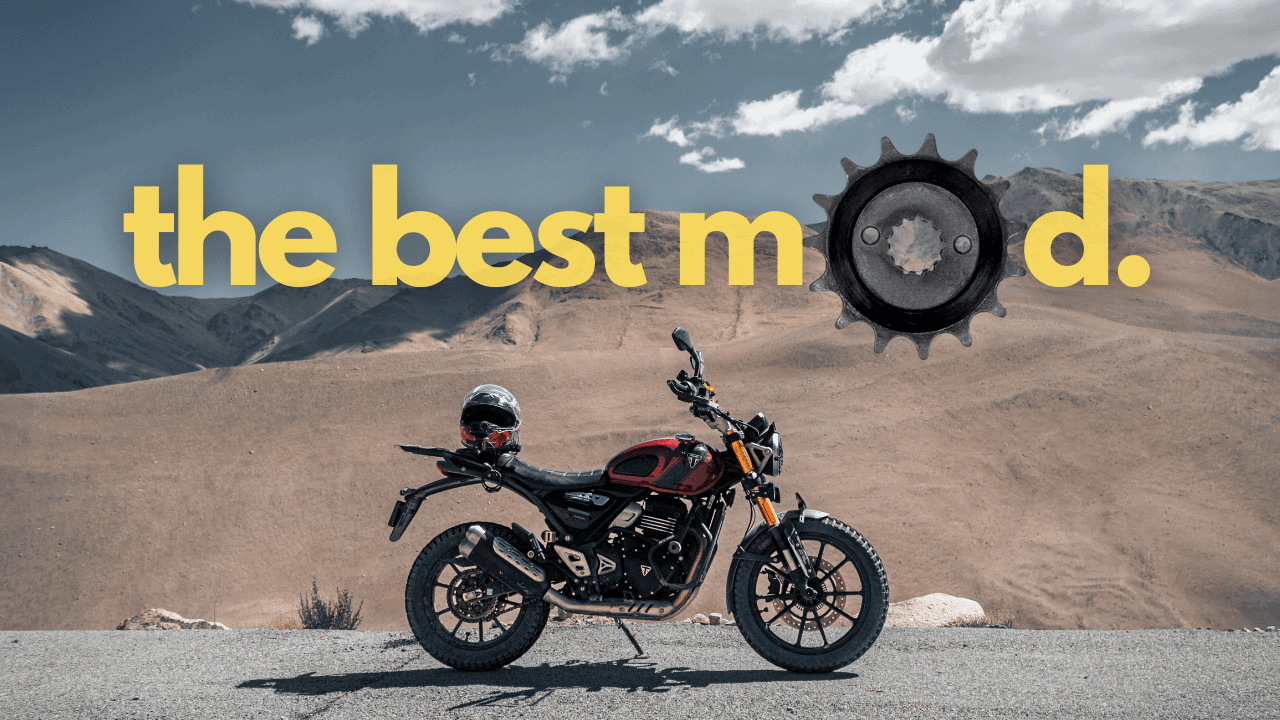
The Triumph Scrambler 400X’s highly responsive and peppy nature of the throttle on the road can be a little too much and intimidating off road. There are two solutions to it. Either you can practice a lot and get used to it, or spend 250 INR and get the 15t front sprocket.
The one nature of the Scrambler 400X that we loved right from the time we test rode the bike is how responsive the throttle was. The bike is quick to rev even with the slightest throttle twist.
However when we started taking it off road, we found that nature to be quite uncomfortable especially when riding an unknown challenging terrain. The extremely sensitive nature of the throttle made it difficult to slowly manoeuver through the trails. The bike jumps even with the slightest throttle movement which gets intimidating.
So I decided to try the Speed 400’s 15t sprocket on the Scrambler 400X. It costs around 270 INR, labour cost excluded.
And now we did more than 4000 kms with it out of which 3000 kms were done in Ladakh and Kashmir. Long story short, it’s the best mod the Scrambler so far. So here are the pros and cons to the 15t sprocket on the Scrambler 400X.
Pros of the 15t front sprocket for the Triumph Scrambler 400X
1. Less Jerkiness
The biggest improvement is the reduced jerkiness especially at low speeds when riding off road. This makes the throttle response a lot more predictable and pleasant.
2. Less Aggressive Engine Braking
Just like the decrease in the jerky throttle, the engine braking also becomes less aggressive and smoother. This is again more useful off-road especially in sandy or slushy conditions. When you cut off throttle in these terrain, the sudden deceleration causes the wheel to dig in. The 15t sprocket smoothens it out and then engine braking is now more manageable and useful.
3. Taller Gear Ratios
The scrambler has very short gear ratios. Even in the city traffic I used to find myself in 6th gear if I wanted to ride in the lower half of the rev range. And while on dirt we found ourselves changing the first 3 gears quite often. With the 15t sprocket, the gear ratios have panned out perfectly.
The first gear is actually usable off road and you don’t need to frequently change gears in city traffic anymore. Surprisingly I didn’t notice any drop in lower end torque as expected. I think it’s mostly because Scrambler has more than enough low end torque to spare.
4. Higher Cruising Speed
One disadvantage of the Triumph Scrambler 400X is that the bike seems to get chocked up around the 6000rpm which roughly translates to 110 kph. Now since the ratios are taller, the bike sits at 300-500 rpm less at a particular speed compared to the 14t sprocket. So now you can cruise comfortably at 120 kph.
5. Smooth Running
Overall, owing to the above mentioned points I feel the bike in general has become smoother and comfortable.
6. No Change In Mileage
I have noticed a slight improvement in mileage on my Himalayan when I made a similar sprocket change. However in Scrambler I think there’s not much change in the mileage. We got a mileage close to 35 kmpl in Ladakh but there in general all bikes get good mileage and so I can’t attribute that to the sprocket. But there’s no drop in mileage for sure.
Cons of the 15t front sprocket for the Triumph Scrambler 400X
I’ve not noticed any con so far. Usually with a higher teeth front sprocket you tend to lose some of the low end torque but surprisingly that wasn’t the case with Scrambler. The bike is still damn responsive and engaging.
Still you can spin the rear wheel on dirt with a slight twist of the throttle and still it climbs steep hills like the high passes in Ladakh in low rpms with ease. That’s why I think the 15t sprocket is the best mod you can get for your Scrambler 400X.
I got rid of my auxiliary lights after installing this headlight. Here’s why I think Vaishnu LED touring headlight is a better alternative to aux lights for your Triumph Scrambler 400X.
Those of you who follow me on Instagram would know that I recently did a weight loss programme on my Himalayan 411 as a part of which I decided to get rid of the aux lights. There are many headlight alternatives ranging from switching to LED bulbs to changing the entire assembly and replacing it with aftermarket ones.
I stumbled on performance touring LED headlights from Vaishnu. I decided to try it on so that i can get rid of the additional weight of aux lights, it’s clamps, wiring harness and so on and boy it’s a game changer. And hence I decided to go with their headlight for Triumph Scrambler 400X as well!
Vaishnu performance LED touring headlights come as a headlight assembly unit. Although it’s a direct plug and play, I got the installation done by my mechanic on the Himalayan and the Triumph Scrambler 400X. I recommend you do that too.
It’s been more than 6000km on the Himalayan and about 200km on the Triumph Scrambler 400X since I’m using them. Let’s get into the pros and cons of Vaishnu Touring LED Headlight
Pros of Vaishnu LED Touring Headlight for Triumph Scrambler 400X
1. Brightness
The brightness and visibility of Vaishnu LED Touring headlight is excellent. It’s almost as comparable to my HJG and Maddog Scout X aux lights. Most of the times I just use the DRL because it itself is sufficient especially in city traffic. On the highways it’s sufficient enough to give a good visibility. Now I don’t do much touring after sunset so this headlight is sufficient for me to get me through emergency scenarios.
2. Well Demarcated Throw
Vaishnu LED touring headlight has a well demarcated throw like a focus light. It’s a projector headlight and has a specific area of throw. If installed and adjusted correctly, it doesn’t throw on the incoming traffic and doesn’t go too wide beyond our field of vision. All the brightness it offers is projected to a good area ahead of the bike.
3. Low wattage
The stock halogen headlight of the Himalayan is of 55w and makes less than half of brightness as the 24w Vaishnu LED headlight. This puts less pressure on the battery and increases its life. My battery is more than 4 years old now and it’s still running healthy.
4. Features of Vaishnu Touring LED Headlight for Triumph Scrambler 400X
It has three different colours or temperatures as they like to call it. One is pure white, next is yellow like the fog lamps and the other a warm white which is a mixture of both. They provide a dedicated switch to change these modes on the Himalayan. While on the Triumph Scrambler 400x, the colour change can be done with the stock switch. The high beam comes in two colour – pure white and yellow which is shared by the warm white and yellow dim light settings
The yellow light is particularly helpful in foggy conditions like when you ride in the western ghats during monsoon. You don’t need a dedicated fog lamp for it. It’s build in.
5. Build Quality
The quality of the wiring harness, the headlight assembly and the switch is good. So far there hasn’t been any issue with the headlight.
6. Customer Service
I had a minor niggle with a loose connection on my Himalayan. When I reached out to them, the team at Vaishnu were quick to respond in helping me out to diagnose and fix the issue.
Cons of Vaishnu LED Touring Headlight for Triumph Scrambler 400X
Vaishnu LED touring headlight for the Triumph Scrambler 400X doesn’t come with a mounting point for the stock headlight grill. When I reached out to them they told me that it was purposely avoided so that the grill won’t cast a shadow with the headlight as it does on the stock one. Nevertheless I wish it had a provision to install a headlight grill for safety purposes.
Cost of Vaishnu LED Touring Headlight for Triumph Scrambler 400X
Vaishnu LED touring headlight costs around 8900 INR for ones without DRL and 9900 INR for ones with the DRL. They have two different styles for the ones with the DRL. I’d suggest you to get one with the DRL as the DRL itself is quite sufficient to use in city limits.
Is Vaishnu LED Touring Headlight a value for money product?
IMO Vaishnu performance touring headlight is a value for money product as the total cost is cheaper than Maddog Scout X which comes upto 10k including the wiring, clamps, switches and so on. I removed my HJG aux lights after installing this headlight. It inturn helped me take off some weight from my Himalayan 411. I’m going to remove the Scout X on Triumph Scrambler 400X and sell it off thereby saving some weight on the Scrambler as well.
Don’t load up your bike with unnecessary accessories. What I’ve learned throughout these years is that loading up the bike might look cool but it affects the mileage and performance. All these part weights adds up to a significant amount. Heavier the bike the difficult it gets to enjoy bike to its full potential. That’s where useful and functional accessories like these headlights come in very handy.
Should you get Vaishnu LED Touring Headlight for Triumph Scrambler 400x?
If you are someone like me who doesn’t tour primarily at night and need some lights to get around in the early morning and late evenings, then this light is perfect for you. You can save weight and space on your bike by not installing additional clamps and wiring for aux lights. These lights are a direct swap for your headlight.
If you are someone who primarily tours in the night, which I never recommend, then these might not be enough. It’s better if you go for even powerful aux lights. For the 99% of users who aren’t satisfied with the stock headlights of the Triumph Scrambler 400X, Vaishnu LED Headlight is the perfect choice.
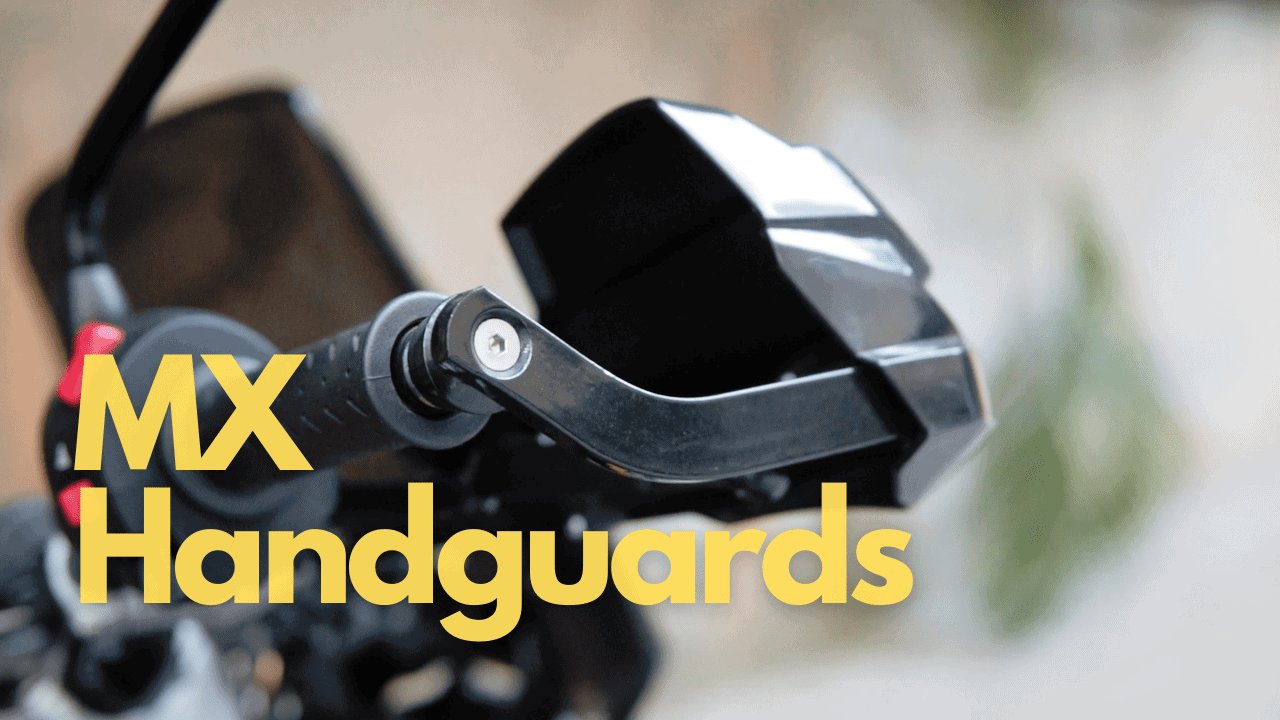
I have always used hand guards on my Himalayan and it has saved my levers and hands in case of falls in remote locations. More than an accessory I consider them an absolute necessity. Himalayan’s stock hand guards were good enough for a few falls. I decided to go for an aftermarket one only because the stock was an open ended one and in each fall, it’d come loose.
I found MX Universal handguards online and thought of giving it a try. After using it for almost 3k km both on and off road, I was really impressed by the quality that I got one for the Scrambler 400X too. So here are the pros and cons I noticed.
The overall quality of these hanguards is very good. It’s very sturdy and has regained its shape even after some serious falls off road.
2. Optional DRL
MX has both a DRL version and a non DRL version. You can use the DRL version for better aesthetics. I didn’t want unnecessary pressure on the battery and hence went for the non DRL one.
The screws that come with the handguards have already started rusting. I wish they provided better quality screws for fitment.
2. Compatibility issues
Although it fit perfectly on the Himalayan with the Magnum Motorsports handlebar, it took some work to get it fixed on the Scrambler 400x. On the Scrambler they had to be bent to a point where there’s a constant tension on the screw that holds the handguards to the handlebar. As a result, during a serious fall, the screw gets bent and stuck inside the handlebar and to get it out is a task.
Overall the MX handguards are a good alternative to the stock handguards. Only thing to keep in mind is to get good quality screws extra and to check whether these will fit your bike or not before purchasing it.