2025 KTM 390 Adventure S – 13000 km Long Term Review

The good, bad & ugly about 2025 KTM 390 Adventure S 14000 kms long term review watch before you buy

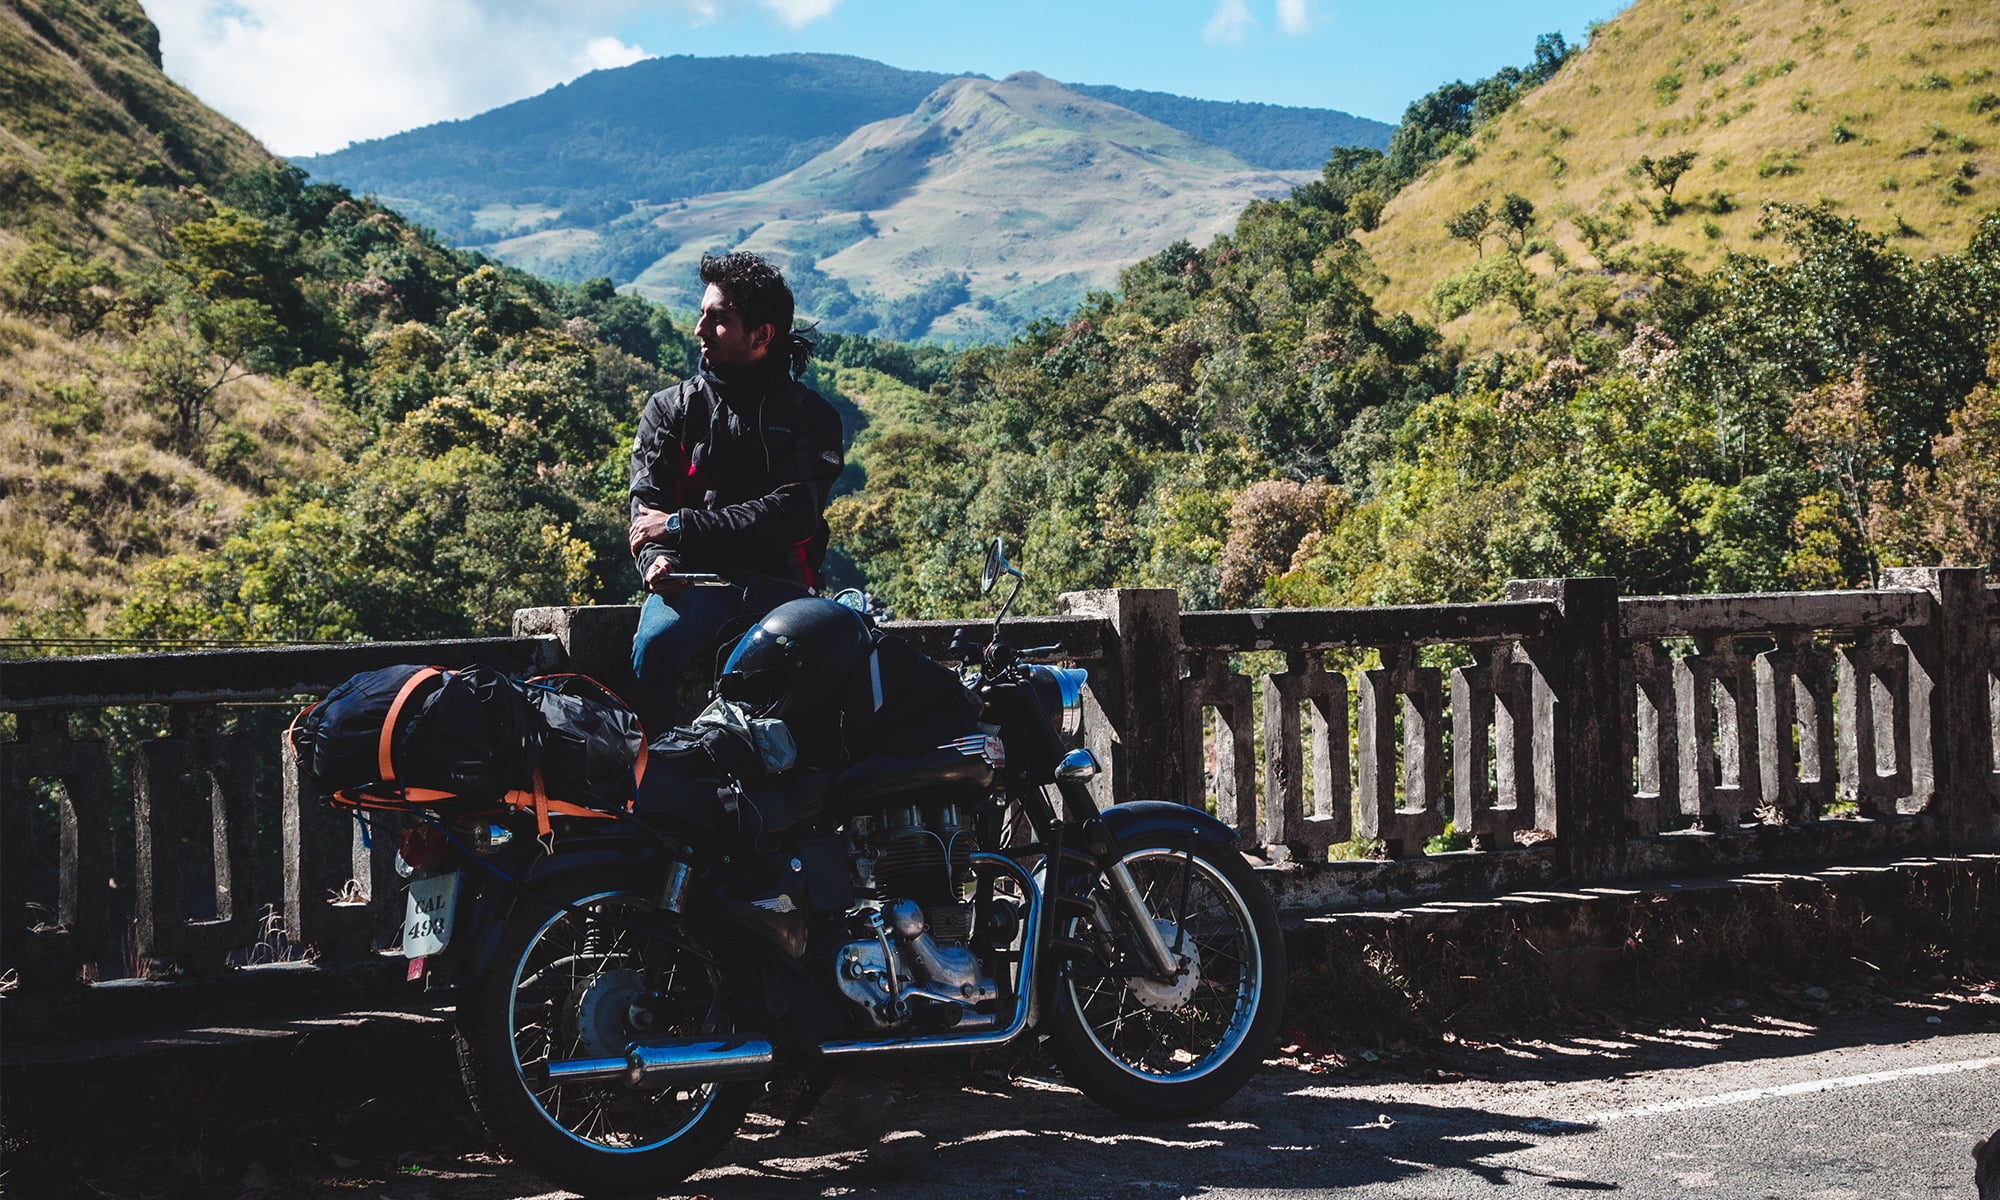
13000kms of trails and highways, 1 off road race, 1 major accident and countless moments of mad fun later, here’s my long term review on the new 2025 KTM 390 Adventure S.

I took delivery of the bike around March 2025. It’s June 2026 now and I’ve spent close to 14k kms on it. I rode it across all kinds of terrain – on road, off road, flat and enduro dirt tracks, on highways and for daily city commutes.

In no particular order here’s what I liked and disliked about 2025 KTM 390 Adventure S.

Pros of 2025 KTM 390 Adventure S

1. Ergonomics

I used to own a Himalayan 411 which I modified a lot. I loved that machine for its ergonomics. When I was looking to upgrade, I couldn’t find any motorcycle in the market that matched its comfort and ease of riding, not even the new Himalayan 450.

When KTM announced the new adventure I was excited to try it out. I went to IBW in Goa in December 2024 to just see the bike in the flesh. We weren’t allowed to ride then. But the moment I sat on the bike, I felt at home.

Both the seating and standing position on the bike felt perfect for my frame. It felt so natural and similar to my modified Himalayan. I couldn’t believe how comfortable and easy it was for me to adjust myself on the bike.

I sat on it like 7-8 different times in the 2 days we were in Goa for the IBW. Once I test rode it months later when it was launched in Bangalore, I loved it and fell for the riding comfort the new Adventure gives.

The foot pegs are perfectly placed. The rider triangle is perfect. The seat and the fuel tank are narrow so that you can hug the bike nicely especially while standing without compromising on the comfort. IMO, KTM just struck gold with the ergonomics on this bike. It makes riding this machine, easy and less intimidating than its competitors in the market.

2. Weight Distribution

I absolutely love the weight distribution of the 2025 KTM 390 Adventure. The moment I sat on it during IBW, the bike just lifted half way up from the side stand even before I laid my hands on the handle bar. It felt so light and nimble. Even though it weighs almost same as the Scrambler 400X, this feels much easier to handle at slow speeds and on the parking lot.

A lot of it has to do with the underbelly exhaust I think. The mass is far down that the bike leans a lot better. And being so light, it bounces back up with just a push of the feet on trail rides. If it were for any other bike I’d have dropped it for safety. Both at stand still and while moving, you don’t feel the weight at all.

This feeling of such low weight gave me the confidence to venture into terrain that otherwise I’d have thought twice and inspired me everyday to push further and to skill up at a faster pace. Even to pick it up from the ground if it falls, it’s the easiest compared to its competitors.

3. Performance

Some would say 2025 KTM 390 Adventure feels underpowered compared to other KTMs but coming from a bullet and then a Himalayan, this is plenty powerful for me. Whack open the throttle and this bike just flies.

The engine has plenty juice left even at 8k rpm. When you’re cruising on the highway at 120, it’s easy to quickly overtake a faster vehicle without downshifting. It’s pulls through very easy. The power delivery in off road mode is very linear and predictable. It’s not intimidating and overtly aggressive for a beginner. The power delivery is tame yet wild at the same time. It’s easy and fun to do wheel slides on this bike.

I absolutely love the crawl feature. Losing the low end tractability for trail riding coming from a Himalayan 411 was the one thing that I feared the most about this bike but I was pleasantly surprised the first time I took it for a test ride.

Even before the first service I went on a few trails just to make sure the crawl feature worked well in the real world scenario and it absolutely does. Even through uneven terrain elevation, the bike just chugs along like a long stroke engine even at second gear in crawling speeds without the need for feathering the clutch.

Unlike the older generation which I managed to stall 5 times during a 2km test ride in the city, I’ve never managed to stall this bike even once during any trail rides or bumper to bumper traffic. It’s brilliant. Hats off to KTM. I don’t miss my Himalayan 411 at all for the low end tractability.

4. Quick Shifter

I love the quick shifter on this bike. It’s smooth and functional. It’s helpful in city commute and lots of fun on the highways. For 90% of the downshifts, I use the quick shifter. It gives a steady engine braking on deceleration.

To whack open the throttle and to use the quick shifter for upshifts is mad fun! The clutch action is very light. The nimbleness of the bike and the light clutch makes this bike effortless on city commute. I got so used to it that now when I ride a bike without it, it feels annoying and weird. This bike has spoiled me in that aspect.

I use it on dirt track too. Even during aggressive downshifts, I’ve never had an incidence where the rear wheel has locked and lost traction. This makes riding on the dirt, fun.

I always ride in rev ranges around 6k to 7k rpm and the upshift works butter smooth at this rev range. The downshifts works smoothly in 4k to 5k rpm. Riding in this rev range gives immediate performance when needed for quick overtakes, gives good amount of engine braking when you cut the throttle and keeps the vibes to a minimum when cruising.

5. Tubeless Spoke Rims

The one thing I was praying to the universe when KTM announced the spoke wheels was that please let it be tubeless. And there it was! I’ve had close to 13 punctures on the Himalayan and it’s a nightmare to fix it on a tube tyre when touring solo.

The people who argue that tube is fine because you’ll get plenty of mechanics across the country hasn’t come across such experiences is what I feel.

Majority of the times, mechanics have refused to fix the puncture unless we remove the wheel and give it to them because they are afraid they’ll damage the disc rotor. I’ve encountered this issue in Ladakh, Madhya Pradesh, Rajasthan and even in Bangalore city.

Removing the wheel while you’re wearing riding gear in high altitudes or in scorching sun is no easy task. I’ve done it many times and it’s not a story worth telling in my opinion. That’s why I installed aluminium rims on my Himalayan 411 and made it tubeless even though it was an expensive affair.

I’m very happy that KTM gave tubeless spokes and that too the conventional one and not the cross spoke ones which are heavier and less reliable than the conventional ones.

I got 2 punctures on my trip to the north east and because of the tubeless rim I was able to get it fixed within 5 minutes and continue riding. The peace of mind that comes with it is priceless.

6. Brakes

The brakes on the 2025 KTM 390 Adventure S are excellent. It’s sharp, has a nice bite to it and is very confidence inspiring on the highways. I hear the Adventure X has organic pads which are not quite good and wears out faster. My suggestion would be to swap the sintered pads from the S.

I also use Dot 5.1 brake fluid from Liqui Molly. It performs the same as Dot 4 in almost all riding conditions like off road, highways and city commute. The only difference I’ve noticed is on flat dirt track practice sessions where when you jam the rear wheel repeatedly for close to an hour and then the rear brake starts to get a bit spongy with the Dot 4 while the Dot 5.1 remains sharp throughout.

7. Electronic Aids

The ABS and traction control are very efficient on the bike and beginner friendly. The downside to it is that if there’s a small dirt patch where you’d want to spin the wheel, it’s not forgiving. You’ll have to stop and disable the TC to get some wheel slides.

On the Scrambler 400X, TC was a little forgiving. But I don’t consider this as a con given the aggressive nature of the KTM engine and the majority of the riders starting to ride on this might not be skilled enough. So the TC is intrusive enough for maximum safety for the beginners and the irresponsible.

The switch console is very tactile, backlit and intuitive. The layout is very easy to use and you can easily change the modes. There are a lot of customisable options, information, layouts and so on. The screen pixel density, brightness, quality and dynamic range are top notch.

I like the auto cancelling indicators. It’s nice how the company has included it in without advertising it. I love the way the warnings pop up and then close to a corner when addressed. All these attention to detail is very commendable.

8. Headlight

Finally! A headlight good enough that I didn’t have to install an aux light! It’s similar to Vaishnu’s LED touring headlight that I had on my Himalayan. Well demarcated, very good throw and spread and height adjustable too. I wish every motorcycle company copied this.

9. Windshield

It’s a wall! It doesn’t allow any wind blast to my face. It’s perfect for my frame. I could easily ride with my dual sport helmet with the beak up to 140 kph with no wind buffeting. This reduced fatigue to a big margin and I don’t need to remove the beak for the highways.

People say the downside to this is the reduced ventilation and heat build up but honestly I didn’t face any such issue. I got this bike delivered at the start of summer in 2025 and I rode through summers of 2025 & 2026 through the city and I didn’t face anything out of the ordinary.

On the other hand during my north east trip during the winter, it well protected my head and chest from cold winds.

The only downside of the windshield is when going off road. I haven’t faced any issue so far but it always scares me a little when I come too close to the windshield while standing and riding through tricky terrain or while doing jumps.

I wish KTM launched the short version of the windshield which they have it on sale in the European markets as power parts.

10. Spares of 2025 KTM 390 Adventure S

The bike being manufactured by Bajaj comes with affordable pricing for the spare parts. Be it the levers, foot pegs, fenders, handlebar, sensors, oils, nuts and bolts are very affordable even compared to companies like RE. So easy replacing of parts as and when it brakes while going off road, helps in not having the fear of a part not being available which prevents you from venturing out into difficult terrain.

11. Service Cost

Service and labour costs are also cheap. Free services which include oil change usually costs around 2k to 3k INR which is really commendable.

Cons of 2025 KTM 390 Adventure S

1. Suspension

The achilles heel of this bike is the suspension. Let me explain.

For context, I had the YSS performance suspension on my Himalayan 411. It was the best mod I had on the Himalayan after the aluminium rims. I was completely spoilt by that suspension. The main reason I went with the S variant over the X, after the 21 inch front wheel was the adjustable suspension. I thought I could achieve the handling similar as the YSS by tweaking it but boy I was wrong.

Now don’t get me wrong. It’s far superior than it’s competitors like the Himalayan 450. That suspension is plenty comfortable but lacks feedback for gaining momentum off road. This on the other hand has well balanced feedback, comfort and traction to go fast over dirt.

But compared to the YSS, the stock suspension on the adventure is very reactive, unstable and behaves very differently at different speeds. The dampening was less for both compression and rebound. Front forks used to bottom out often during jumps even at the hardest setting. Hoping to tame it a little, I changed the fork oil to 15w grade from Liqui Molly during the first service itself but it didn’t make much difference.

At the softest or fastest setting of the compression and slowest or hardest setting of rebound, the forks are highly reactive and unstable under hard acceleration or at speeds above 80 kph on uneven terrain. It jerks and flicks the handlebar violently throwing you completely off the track and forcing you to slow down to gain control.

I never had such issues on the Himalayan with the YSS. That suspension gave me confidence to pick up pace off road so much so that I felt I was running out of engine performance and that’s what made me upgrade. But here, it’s the opposite. The suspension is so unstable that I quickly lose confidence even before the engine reaches half of its performance capacity.

I don’t know if it’s just my bike’s issue but I got it checked and there was nothing wrong. And then just as I feared the worst, I suffered a tank slapper accident on an empty stretch of road while I was on my way to work.

I was bed ridden for 2.5 months, had to undergo a minor foot surgery and the bike suffered damages worth 48k INR and spend close to 2 months in the service centre for insurance approvals and repairs.

After a lot of testing, I came up with a decent setting for my body weight and style of riding on the stock suspension. That’s 26 clicks of compression, 16 clicks of rebound with 15w fork oil, 4th setting of preload on the rear (that’s 31% sag of the travel) and 14 clicks of rebound at the shock.

With these, the bike used to manage all terrains smoothly with adequate feedback and traction up to 40 kph. Pick up pace or hard accelerate and the front completely loses its shit. It’s very scary and off putting. I wasn’t happy at all with the stock suspension.

Finally I got the rally suspension from Zedling and oh boy it’s a game changer! It deserves a spotlight of its own so stay tuned for that review.

2. Stability

Being light weight has it’s own downsides. The bike doesn’t give a planted or a stable feeling on the highways at speeds above 110 kph. The front end of the bike doesn’t inspire much confidence. During heavy cross winds, the bike sways a lot and you’ll be forced to slow down.

I’ve ridden the Scrambler 400x, the Himalayan 411 and this KTM 390 Adventure on the Chitradurga windmill stretch on the Bangalore Pune highway where you usually get a lot of strong cross winds.

Out of all the 3 bikes, the KTM has felt so unstable that I had to slow down few times to keep the bike steady and planted during strong cross winds. I wish the front end felt more stable and planted to inspire more confidence at high speeds.

The bike also behaves very differently to the weight on the bike. It feels a lot more stable with a full tank of fuel or even with a loaded tank bag and behaves completely unstable at high speeds with a near empty tank.

During trail rides and dirt track practice sessions, we won’t have any luggage and we’ll keep the tank only half filled to make it easier to ride on slow technical terrain. But to get to these trails we’ll have to cover few stretches of highways. That’s where this instability becomes very annoying.

I find myself sitting so close to the tank and even leaning forward and shifting the weight to the front to touch speeds of 140kph without losing stability. Especially after the tank slapper incident, after the trails or dirt track sessions, I quickly fill up the tank from the nearest pump before hitting the highways just to have that added stability.

This isn’t much of an issue if the bike is fully loaded with luggage. There could be a few possibilities here. I think the fairings and the wind shield catch a lot of wind due to its large surface area thereby making the bike feel unsteady.

Another speculation I have is that the bike would’ve been by default designed for an 18 inch rear wheel as the Adventure R and then the 17 inch would’ve been put for the Indian market. The change in the angle would’ve been not accounted for because I’ve not heard users of the ADV X or the ADV R complain of this issue.

I think the 21/17 inch combo puts the front at a higher angle than the rear since the chassis across all these bikes are the same which makes it feel unstable and less planted at high speeds and during quick accelerations.

The Scrambler 400x weighing just 3-4 kgs heavier than the adventure felt much more planted at those speeds so it’s not about weight I think. Maybe it has more to do with the angle I mentioned.

3. Refinement

2025 KTM 390 Adventure is the least refined bike I’ve ridden. The handlebar, foot pegs and the seat buzz a lot. I get tingling of the feet and hands after every hour of highway riding. This tingling was very annoying at first but gradually I got used to it.

It’s a very coarse and buzzy motorcycle which doesn’t have a settling point or sweet spot. The buzz becomes finer after 7k rpm but never goes away. The plastic fairings rattle a lot. After buying this bike I started using these 3M ear plugs every single day for my commute as its not at all a pleasant experience listening to the bike.

So you might ask, why did you buy this then?. Well, these vibrations doesn’t annoy me. In fact I love it! The buzz gives a nice feedback from the engine as the revs climb. It gives the kick and the adrenaline rush and I absolutely love it especially on dirt track practice sessions.

This keeps the bike always engaging and demanding. I love that character so far. It’s very different from the Himalayan or the Scrambler 400X which had its sweet spots and a relaxed rev range. You’ll always feel engaged and busy on the bike.

I understand it’s not for everyone. Especially people coming from 100cc bikes or Japanese motorcycles will be easily put off by these vibes and I’m not here to convince you to live with it. You don’t need to.

But those who love the aggression while riding, you’ll love KTM’s feedback. The downside to this is that you can’t have a leisure ride as you would do on the Scrambler 400X or the Himalayan 411. It demands aggression and riding at mid to high RPMs all the time.

These vibrations and buzz only marginally improves with subsequent service. So if you’re put off by the lack of refinement during the test ride, then please don’t buy the bike expecting it’ll be different on a new bike or a well serviced one.

Many have fallen into this false notion and have later regretted it. I see this never ending quest to find a solution to this buzz from many owners in KTM whatsapp groups. No it does not get better with time and no there’s no accessory or mod that magically makes it go away. Get used to it or don’t get one. Period.

This bike is suited only for aggressive riding and boy does it reward you well on that aspect. But for a relaxed and smooth riding, this bike just kills the vibe with its vibes.

4. Reliability

The build quality and the reliability of the bike is concerning. I went on a trip to Gokarna last year and on the way one of the bolts holding the pillion foot rest on the left side fell off. The whole assembly became loose and downshifting of the gear lever became hard.

These issues were common with RE bikes but I didn’t expect it from KTM. I had the oil pressure sensor, brake switch sensor and clutch lever sensor replaced due to malfunctioning within first 5k kms of usage.

Also the engine oil burning issue everyone’s facing. There’s no solution to it till now from KTM other than empty promises of parts being replaced under warranty. I have to carry a 500ml oil can on all my trips. It burns around 300ml every 2k kms.

The stock coolant also sucked. It used to give high coolant temperature warnings all the time. I changed to Motul Motocool and that issue has been completely resolved. It keeps the coolant temperature around 5-6 degrees cooler than the stock.

Same with the prolube engine oil. It sucks. The engine clatters and runs coarse with the HP prolube. Gear shifts are also clunky and hard. I use Amsoil which is far superior to prolube in terms of life and performance at high temperatures.

Whatever fluid that comes stock in bike isn’t reliable at all. I wish KTM didn’t cut costs in this aspect and provided better fluids even if it raises the costs a bit much.

5. Fuel Economy

It’s something very subjective and I don’t consider it a con based on my aggressive riding style. I get around 19-20 kmpl in the city and 23-24 on the highways.

Considering the competition in the market, this seems a little low but I think it’s fair to expect this based on the performance it gives. I believe if you ride in a less aggressive style you’ll get better economy but where’s the fun in that.

6. Tires

The stock Apollo tires are good enough for the majority of users. It’s got good wet and dry grip on road but it isn’t good on the dirt. When KTM has given dual purpose tires for the Adventure R abroad, I wish they gave similar tires like the Reise TrailR as stock which is much better equipped for dirt. I’m using the TrailR now and I’ve made a separate blog about it.

7. Service Quality

Service greatly vary from centre to center and franchise to franchise. I haven’t had good experience from the Mekhri experience service centre in Bangalore. From incomplete work, falsely billing parts without replacing them, long waiting time for parts, poor coordination with insurance company to incessant calls from the advisor for a 10 star review, the overall experience has been suboptimal.

Even then issues like fork alignment is never done by the service centre folks. For any major repairs needed from off road bashing and for diagnosing issues, I give the bike to LBS pitstop and so far they have been very helpful in resolving my issues.

As for the company service centres, I resort only to the basic periodic service just so that I can keep the warranty and all the major diagnosing and repairs out of the scope of warranty, I give it to trusted third party centres.

That’s my list of pros and cons of the 2025 KTM 390 Adventure S. Now who is this bike for? Before we go into my recommendation on who should consider this bike, I want to address something that’s the most asked in my comments section.

8. Seat Height of 2025 KTM 390 Adventure S

The stock seat height of 2025 KTM 390 Adventure S is 830mm. After the installation of Zedling Rally Suspension and the touring seat, the seat height is now close to 845mm. I’m 5 foot 5 inch or 165 cm tall and weigh 62 kg. I don’t flat foot on the bike and in fact I can’t touch the ground with my feet when the bike is completely upright.

Those who tell tall bikes are not suitable for short riders are idiots in my opinion. They are just passing on their insecurity or laziness to you and please don’t listen to them no matter how big of a name they have in the industry. The only automotive journalist or reviewer I’ve heard say that height doesn’t matter is Shumi from MotorInc and I respect him for that because it’s true.

Once I started getting more into off road, I was looking to upgrade from my Bullet in 2020. Like everyone else, instead of taking test rides, I kept watching review videos. The two bikes I shortlisted at that time were the Hero XPulse and Himalayan 411. I too believed these big names in the scene talking about seat height and got discouraged to test ride the X pulse.

A year after buying the Himalayan 411, I rode a friend’s X Pulse and was mind blown on how easy it was to ride compared to the Himalayan 411 even though it was much taller and I couldn’t flat foot it.

That’s when I realised that seat height isn’t the only thing which decides how easy it is to ride a motorcycle. A lot of other factors like the weight distribution, the seat width, seating ergonomics, suspension sag and so on, decides how easy it is to ride.

For example the 2025 KTM ADV S and Scrambler 400X has the same seat height on the spec sheet but completely differ on how they feel due to the seat design and weight distribution.

The second aspect is skill. Riding tall bikes is a skill which you can easily acquire by taking training and I recommend every single one of you to take training. You think you know how to ride a bike but you’ll not get to know how much you absolutely suck at it unless you take training. And it’s not your fault. It’s the system that has failed us.

In most places there isn’t a dedicated school for motorcycle training to attend before you take a lisence test. Most of you would’ve studied how to drive a car and then how to ride bicycle as a child. At the most you’d have practiced on a bike taking an 8 on an empty gorund few days prior to the driving test.

And on the test day they’ll give you a small bike which clutch has been adjusted to make it never stall. Take an 8 before the officer and viola! You have your lisence.

This is not how you ride motorcycles. There are a lot of technique that goes into body positioning, balancing, clutch and throttle control, braking and so on that’s far more sophisticated than driving a car in my opinion. People who doesn’t know any of this confidently blurt out that flat footing a bike is essential to ride one.

They couldn’t be more wrong. And riding like that for years doesn’t make you a great rider. It makes you a confident dumbfuck. Practice doesn’t make you perfect. It makes the wrong techniques permanent.

When you’re starting to ride and if you’re met with a stranger or any family member who confidently says you need planted foot to ride and if they expect you to listen to them just because they have been riding for many years, just politely smile and wave all while just asking them to fuck off in your mind.

Walk into a nearby dirt school or a track school, enroll for a 2 day beginner’s course and trust me it’ll change your life.

It’s never too late to take training and it’s not expensive either. Most of the dirt schools in Bangalore offer basic training for around 5k INR. And don’t give me the excuses of age or distance. I’ve seen 50 and 60 year olds travel all the way from places like Trivandrum to Bangalore overnight, take training for two days and go back.

If you can buy a bike for 2 lacs INR, you can afford to get classes that cost just a fraction of the bike.

I believe watching tutorials online isn’t going to help much. In person training is the way to go where there’s an expert to guide you and correct you. This isn’t a skill that you can learn by watching videos in my opinion.

If I being so short can ride a tall bike confidently, anyone in the world irrespective of their gender or age can ride tall bikes. I owe my confidence to taking off road training and consistently practicing and improving those skills I’ve learned.

Folks who are starting out or who want to start riding tall bikes, please don’t get discouraged from such stupid statements be it from any senior automotive journalist or big YouTubers alike. Just skill up. Do not let your height define what you can or cannot do with respect to motorcycles.

Now for tall riders, please take test rides. Even though you might have an added advantage, sometimes the ergonomics might not suit you and you might feel cramped on one bike while being relaxed on the other with same seat heights.

With that being said, I won’t be answering any comments related to seat height. I don’t ride with a pillion nor I’ve ridden as a pillion on this motorcycle so I cannot comment on the pillion comfort either.

Who Should Buy The 2025 KTM 390 Adventure S?

If you love sheer performance, the adrenaline rush, the mad fun which makes you laugh like a maniac, then 2025 KTM 390 Adventure S is the best single cylinder adventure bike in the market. It’s fun, agile, non intimidating and engaging without sacrificing comfort.

If you want to enjoy riding forest trails, dirt tracks and wants to tour with challenging terrains on the mind, then this bike makes the perfect choice. It’s an all rounder. A jack of all trades.

If you are looking for a more refined, comfortable touring bike that does the job of getting you from point A to B well, then Himalayan 450 or the Scrambler 400X would make a better choice as it’s more stable on the highways and has better refined engines to give you smoother and comfortable ride for longer hours.

They aren’t great for serious off road riding but does the job of munching miles well. All 3 bikes are very similar on the spec sheet but miles apart on the character. So only a test ride of these bikes will give you an idea of what you want in a adventure motorcycles.

2025 KTM 390 Adventure S demands aggression, RE Himalayan 450 is better suited for relaxed highway riding and the Scrambler 400X does a mix of both.

Should You Consider The KTM 390 Adventure X?

Personally I wouldn’t recommend the X to anyone even though everyone says it’s the best in the ADV lineup. If you’re serious about off road, go for the S or the R as it has 21 inch front wheel, cross spoke wheels and better suspension.

If you’re looking for a tourer, Himalayan 450 is the better option and for everything else, I still think Scrambler 400X is the best in terms of refinement.

Getting the ADV X over the H450 or Scrambler just for its electronic package isn’t worth it. Indian highways aren’t very safe to use cruise control peacefully. And you won’t miss the quick shifter on the Scrambler or the H450.

Should You Consider The KTM 390 Adventure R?

If you’re serious about off road and isn’t worried about tube type tires, then definitely go for the ADV R. It’s a much better option with long travel suspension, 18 inch rear wheel with dual purpose tires. ADV R released a year after I got my bike. If it had been there in the Indian market from the beginning I’d have definitely got it.

I think you can make the tube type rims on the ADV R tubeless using the way2speed solution like I did on my Himalayan and use the stock Mitas tires as they are tubeless compatible.

I highly recommend you take test rides of all these bikes if you’re looking to get one. Only a test ride can tell you which bikes suite you and no person on youtube can decide for you. All these bikes differ greatly in character than spec sheet so you have to ride it to know which suits you better.

I’m not a reviewer. I don’t make a living out of this. I won’t comment on the bikes I haven’t ridden or which I don’t intent to ride. The H450, Scrambler 400X and the 2025 KTM 390 Adventure S are the only 3 bikes in this category that I have used over a long period of time. So questions about comparisons with any other bike will not be answered nor the request to try some bike and give opinion will be entertained.

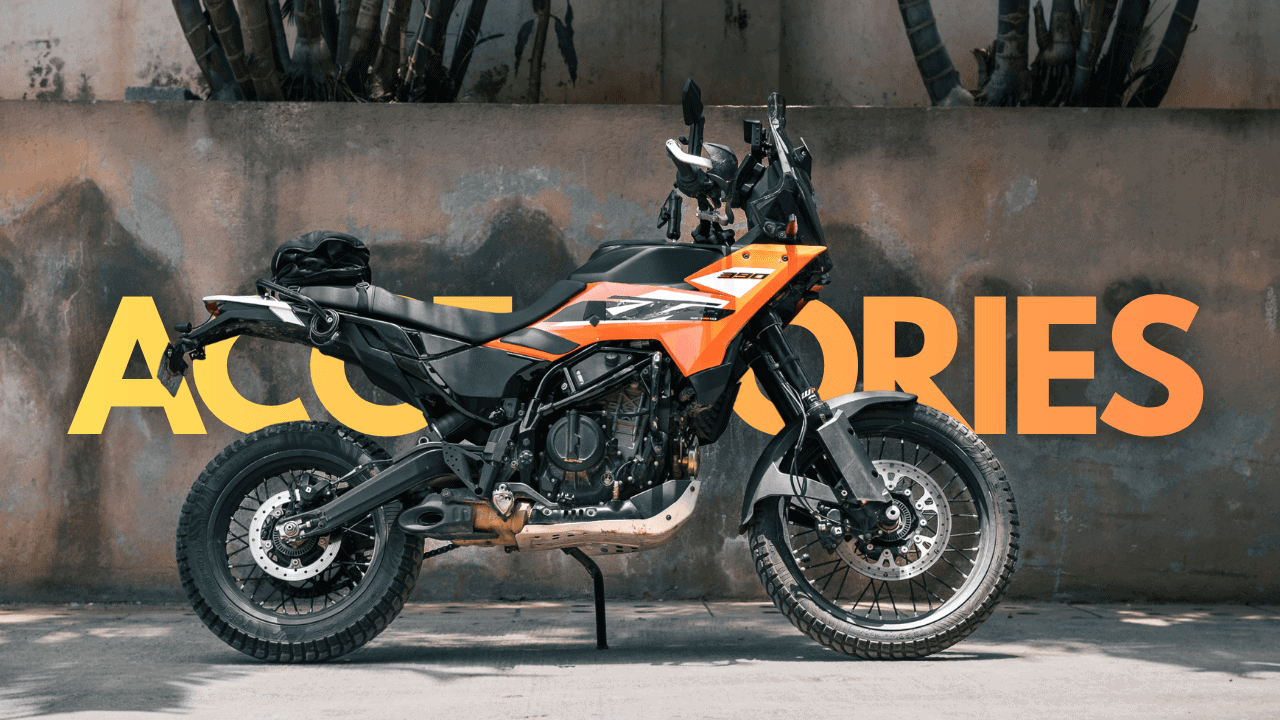
I have made a blog on the accessories that I have installed on the bike to make the overall experience a little better. Please feel free to post your opinions and your experience on this motorcycle in the comment section.

YouTube player

All you need 2025 KTM 390 Adventure Accessories

All you need accessories for KTM 390 350 adventure s

Ever since the new 2025 KTM 390 Adventure was launched, it’s been a rat race by manufacturers and content creators alike to load up the machine with unnecessary accessories. Most of them even defeats the very purpose of what the bike is designed for.

So after testing out a few accessories for over 12k km, here are the ones that I think are useful on the 2025 KTM 390/350 Adventure. I’ll share the thought process behind each and every one of them, how they perform in real world scenarios and maybe some pros and cons along the way.

None of the KTM 390 Adventure accessories I’m going to mention are sponsored. All the products I’m going to mention have been bought with my own money and tested for more than 12k kms over a period of 1 year and 1 month.

List of 2025 KTM 390 Adventure Accessories

1. Motovibe India GPS holder for 2025 KTM 390 Adventure

Motovibe’s GPS mount or mobile phone holder is a 3D printed plastic base with a RAM ball mount that perfectly fits onto the slot on the bike. It’s specifically made for the 2025 KTM 390 Adventure and hence it slides into the slot and fits perfectly.

The build quality is solid. I have done a lot of jumps on the bike and even suffered a gnarly accident that broke almost half the bike, but the holder has held strong. It’s sleek and sits aesthetically well in line.

The only issue is that during hard jumps, the holder tends to come loose but you can always reach out and tighten it after adjusting the unit or your phone holder. The holder has a slight free play too so make sure you leave enough space between the console and the holder for free movement while riding off road.

I have used Revcraft’s holder too but it’s ball head is a separate unit and tends to come loose overtime and starts shaking. Hence I switched to Motovibe’s holder and it has no issues at all. I’m super happy with it and highly recommend it. It’s around 1500 INR. Link – Motovibe India GPS holder for KTM 390 Adventure 2025

2. Aoocci C5 Pro

Aoocci C5 Pro carplay device is fantastic. It makes life on the bike a lot easier than using a phone for navigation. I’ve made a separate blog about it as it deserves a spotlight of its own.

3. Side Stand Extender

I’ve had side stand extenders on all my bikes as they prevent the bike from sinking on sand or slush. I’ve used the one from Revcraft for a long time but it’s screws tend to come loose and rattle overtime even with locktite so I switched to the one from Viaterra.

Unfortunately, the screws on that also came lose and fell off somewhere. Side stand extenders are an absolute necessity for anyone going off road. I’m on the search for a good one and if you have any suggestions that’s sturdy enough, please post them in the comments below.

4. Double Adventure Mirrors

Even though the stock mirror is absolutely brilliant, it sits a bit lower and outwards than the handlebar. It’s the first point of impact during a fall and tends to break very often. So I got the double adventure mirrors from sparify. It’s a knock off of the double take adventure mirror which costs around 16k. This one is 2k INR a pair.

It pivots at 2 points and it’s completely foldable when going off road. I have set it at a height comfortable for me and inside the level of the handlebar. It has the same field of view as the stock and is a lot lighter than the stock. The only downside to these are the buzz. It vibrates a lot more than the stock at highway speeds but I don’t mind that compared to the adjustability it gives.

I’ve also stuck a generic blind spot mirror on this which is very helpful in highways where you might miss bikes or cars coming at a fast pace to over take you while changing lanes. Link – Double Adventure Mirrors, Blind Spot Mirror.

5. Barkbusters Hand Guards Frame with Acerbis X Factory Hand Guards

The stock hand guards are useless and I used to use my favourite Acerbis copy hand guards that I have used on my previous bike. It works great for the price and I still recommend it for 90% of the users. It’s a use and throw product.

But with this bike, I’ve started to push myself further in off road trails and dirt track and as a result of which I’ve been falling very often. I ended up changing 4-5 pairs of those hand guards to a point where I decided I need to get something more sturdy for my use case scenario.

And hence I got these handguard frame for the Himalayan 450 from barkbusters (as the bike specific one wasn’t launched yet at that time) and the Acerbis X Factory hand guards as suggested by a fellow adventure owner. And this thing is damn durable. I have suffered lot of falls in dirt track and trails and it hasn’t budged even a bit.

The acerbis plastic handguard is compatible only if you have a handle bar riser installed and the frame isn’t compatible with the stock bar end weights. But the frame and spacers add enough weight that it performs same as with the bar end weights. The vibes don’t go up without the bar end weights when you have the hand guards with the spacers installed.

The frame costs around 9000 INR and the hand guard costs around 2500 a pair. The Acerbis hand guards looks better than the Barkbuster VPS ones and are half the price. This combo is worth the investment and I highly recommend to anyone who rides off road more often. Link – Barkbusters Hand Guard Frame, Acerbis X Factory Hand Guards

6. Duke 390 Leg Guard

The stock crash guard is great. It offers great protection and comes with a good slider to take on the impact. But I’ve felt it a bit unnecessary. The international variant doesn’t even come with a crash guard. And why do you need so much metal to protect plastic?

So to reduce weight and for better looks, I installed the crash guards from gen 3 Duke 390 since it’s a direct fit. IMO this is more than enough in case of fall to protect critical components.

I’ve had quite few falls in off road and these guards have taken good beating and yet retain its shape and function to a great extent. These costs only 1500 a pair and is the best alternative to the heavier and buzzier stock crash guards. Link – Duke 390 Leg Guard.

7. PPF on 2025 KTM 390 Adventure

When I bought the bike, spare parts for the Adventure X wasn’t available so I had to get black PPF done over the white parts for aesthetics. It actually costs a hell lot more than the black panels from the X which I will get next if PPF ever comes off.

Over a period of time the PPF has taken significant damage and has started to come off because of multiple falls during track practices. So once everything comes off, I’m planning to get the black panels from the adventure X which costs around 2500 INR instead of spending 12k again to get PPF done.

I got the visor tinted too which looks nice to me.

8. Helmet Lock

A generic helmet lock to secure the helmet to the bike. Link – Helmet Lock

9. Mototrendz Fork Seal Cover

I use fork seal cover from Moto trends. These are quite cheap and does the job well to protect the USD forks from muck and grime. Expensive ones like the ones from Kriega look better but these provide the same function as them. 650 INR.

These aren’t install and forget accessories. After every off road ride, you’ll have to remove and wash them, dry them and put it back or else the muck that’s caught by these fork seals can itself prove detrimental once it dries and hardens. Link – Mototrendz Fork Seal Cover.

10. Auto Engina Grab Rail

The stock grab rail is too wide, heavy and does not close at the rear. Hence I got these from Autoengina. It’s sleek, weighs lighter than the stock and has a closed loop which helps in hooking up the rackless saddle bag from dirtsack.

The only issue is that the paint comes off after a while when you have a helmet lock on the grab rail. Link – Auto Engina Grab Rail.

11. Rideflex Foldable Brake Lever

Rideflex bendable brake lever well complements the stock foldable gear lever. If you’re a follower of this blog you’ll be knowing that I’m a long time user of Easy Brake from ProSpec on my bikes but during one of the dirt track practice sessions, it broke off. So I got this and it’s very sturdy and useful. It costs around 2.5k INR.

There are two minor issues that I have noticed with this. First is that the pointy screws can get uncomfortable if you ride with shoes that has very thin soles. With riding boots, you’ll not have that issue. Secondly this lever and the spring tends to get stuck very often especially with mud so be careful to clean it regularly and lube it with WD40. Link – Rideflex Foldable Brake Lever.

12. Touring Seat by KTM 390 Adventure Accessories

The stock seat is good enough for most of the use case scenario. But I have heard that for heavier riders, stock seat can get uncomfortable. I didn’t have any issues with the stock seat even during long rides. But I tried the touring seat from KTM on another bike and I felt it a bit more comfortable than the stock so I got it.

It’s slightly heavier, firmer, denser, wider and taller seat than the stock. It’s an added luxury I’d say as the stock seat isn’t bad at all. I weigh 62kgs so stock seat didn’t give me any issues. The touring seat is slightly better than the stock and I’d suggest you to try this only if you feel the stock isn’t adequate enough for your use. It costs around 2900 INR. Link – Touring Seat.

13. Heel Guard

I don’t ride with pillion and hence i removed the pillion foot rest which saves more than a kg of weight and installed these heel guards from KTM itself. Remember, lighter the bike, better it performs in all aspects.

14. Skydd Tail Tidy

Again, to reduce the weight further, I got rid of the bulky tail end and installed this tail tidy from Skydd. It looks sleek and does the job well. It costs around 1k INR. Link – Skydd Tail Tidy.

15. HJG Bullet Indicators

The stock indicators used to break very frequently especially when it’s parked in tight spots. Somebody brushes against your bike and the first thing that breaks is your indicator. And each time it costs 1000 INR to replace it. So I got these bullet indicators from HJG. It’s bright enough and is sleek enough as to not break easily. It costs around 500 INR.

The only issue is that you’ll need to cut the indicator wire to install it and since the impedance is different from the stock indicator, the console will show a warning and the indicators on the console will blink at a faster rate. But the indicators work just fine. Link – Bullet Indicators.

16. Zedling Rally Suspension

The stock suspension sucks IMO for my use case scenario and so I got the Zedling Rally suspension installed. I’ll talk more about this in the upcoming review blog of the bike and a separate blog on the Zedling Rally because this too deserves a spotlight of its own. Link – Zedling Rally Suspension.

17. Side Stand From KTM 390 Adventure R Accessories

Once I installed the Zedling rally suspension which has 250mm of travel, the seat height as gone up by half an inch and it sits close to 845mm now. Hence the bike used to lean more on it’s side stand. To tackle this, I have installed the side stand from Adventure R version which is longer than the S.

The only issue was that the stand used to touch the swing arm since the geometry of some things related to the chassis in R is different from S variant. So I got a stopper welded onto the stand which solved the issue.

18. Enduro R Rear Sprocket and Chain

Forget fuelx and air filter and all that stuff. I think the best performance mod you can get for your Adventure S or X is the rear 48 teeth sprocket from the Enduro R along with the chain which has 6 links more than the S. Paired with the off road throttle respond in the off road riding mode, it’s a mad and addictive improvement in the initial acceleration.

Regarding all the other performance mods like fuelx and air filter and all that, I’ve made separate blogs. Long story short, it’s not worth spending that much money for some mere marginal and mostly placebo gains. I’ll not be doing any of that to my KTM.

It improves the initial acceleration and the bike becomes quicker by revving faster. It’s a lot of fun. It costs around 3k for chain and sprocket and I think it’s totally worth it. Yes top speed may reduce but who sits at 160 kph on the highway all day? I still cruise around 140kph with this sprocket and it does the job fine. And on dirt, it’s mad fun.

19. Console Screen Guard

I’ve put a generic screen guard on the console which has already developed a scratch. It’s not a necessity but it’s good to have as an additional layer of protection for the rather expensive console. It’s a generic one for the gen3 duke 390 which has the same screen dimensions. Link – Duke 390 Screen Protector.

20. RideTek Tank Grips

The rubber tank grips from Ridetek are amazing. I have stuck the bigger patches on the area where my knee and leg comes in contact while riding and a small patch on the area where my knee comes in contact while sitting and riding. They provide adequate grip when hugging the frame while riding off road.

They have a large patch that comes on the side decal but I haven’t stuck it as it covers half of the KTM logo and I need more grip while standing than sitting. You can cut the pads if you want to shape it whichever you want it and once it sticks, it’s never coming off. Link – Ridetek Tank Grips.

21. Lower Fender – KTM 390 Adventure Accessories

The high front fender is catching a lot of wind during hard accelerations and creating so much drag that the front starts to feel light especially when fuel in the tank is also low. So I got the low fender from KTM and got rid of the high fender. Mind you this drag is noticeable only when you whack open the throttle on an empty stretch of road and doesn’t make any difference in city commutes or off road rides.

I’m sure the low fender will give some trouble during monsoons and slushy conditions with the mud getting stuck between the fender and tyre but I’m willing to live with it as personally the bike looks damn sexy like a T7 or a Transalp without the high fender.

22. Reise TrailR Tires

Reise TrailR is the only tyre I’ve come across in Indian market that offers the best grip off road while being legal and decent enough to ride it on tarmac. I’ve made a detailed blog about these tires.

Now they don’t have a tubeless 21inch tyre as of now but I’m running the tube type tyre without the tube on this tubeless rim. Granted theoretically the tube type tyres will have weaker sidewalls but I haven’t had any issues with air leakage and the tyre slipping out of the bead and all that.

I even ran the tyre close to 22psi in an off road race and still didn’t run into any issues. So as long as you run adequate tyre pressures, you’re good to use the tube type tyre without tube on the tubeless rim. Link – Reise TrailR

Here’s a video of all the accesoories that you need to avoid on your KTM 390 Adventure

YouTube player

Aoocci C5 Pro – The Best CarPlay/Auto Device For Your Motorcycle

Why choose a carplay device instead of an android phone aoocci c5 pro review

Two reasons why I got the Aoocci C5 Pro Carplay for my motorcycle and here’s my honest review on it.

During my trip to Rann and Rajasthan in December 2023, my iphone 12 mini, a used phone that I bought on EMI just 3 month’s prior to the trip, got ruined. The OIS of the camera got damaged because I was using my phone for navigation throughout the trip.

I then started using my friend’s basic android phone for navigation. But that phone used to get heated up on long rides and then the map would freeze.

This is the second reason I decided to go for a CarPlay system for my motorcycle even though it’s an expensive affair.

I got the AOOCCI C5 Pro CarPlay system as it was the cheapest on the market around May 2024. I was quiet skeptical about these products since they are fairly new and hence I went for the cheapest one to try it out.

But I must say I was pleasantly surprised. Before getting into the pros and cons, I’ll get into the features first.

Features of Aoocci C5 Pro

The Aoocci C5 system comes with a 5 inch touch screen, 2 dash cams and two TPMS sensors along with the wiring, clamps and everything that’s needed for it’s installation.

It connects with bluetooth and wifi of your mobile and uses CarPlay and Android auto feature for apple and android phones respectively.

Basically it mirrors almost all the needed functions of your phone to the screen so that you can use your phone without having to use your phone. If you have already used these systems in cars, then you’ll be familiar with it.

Most of the basic apps on your phone like messages, calls, whatsapp, music, maps and other CarPlay supported apps can be used with this device. You can connect your intercom to it via bluetooth and you can make or answer calls with it, hear turn by turn voice navigation, listen to music or podcasts and so on.

There are many apps that provide weather info too. Now I’m an apple user so I’ll share the CarPlay details in this video and I’m sure android auto will have the same if not more features.

Apart from CarPlay features, it has live recording of both rear and front camera. You have to put in a micro sd card and it’ll loop record as soon as the ignition is on. You can access these recordings in the device itself or you have an app by which you can view and download the footage on your phone.

It records up to 2k resolution which is good enough to zoom in on number plates and other small details.

The other most helpful feature is the TPMS. It comes with 2 sensors which you can attach to your wheels and it gives real time reading of your tyre pressures. You can set the minimum and maximum values below or above which it gives you an alarm.

Pros of Aoocci C5 Pro

1. Responsiveness

The speed and responsiveness of the screen is just amazing. It almost feels like operating a smartphone. The touch is very responsive and smooth even with gloves on, the maps are very quick when it comes to navigating through tight city traffic.

There’s no lag until you have good gps signal on your phone. It even works with offline maps so you don’t need an internet connection on your phone and this was particularly useful in Ladakh.

2. Brightness and contrast

The screen is very bright. I use it at 50% brightness in broad daylight and at 0% at night. It’s that bright even in direct sunlight.

And the contrast is amazing. The black portions of the screen are truly black and the all the colours and whites stand out.

3. Heat

Since it doesn’t have a battery, it doesn’t get heated up much. And even during operating at daytime for long hours under the sun, the responsiveness doesn’t decrease. That’s the biggest advantage over using an android phone for navigation.

4. Waterproof

My console gets fogged up after a pressure wash but this has sustained many pressure washes and heavy rains. I would still recommend not directly pressure washing the unit but it’s safe even if you do.

5. Vibration Resistant

Both the bikes that this device has been on, the Himalayan 411 and now the KTM 390 Adventure, aren’t the smoothest bikes out there. This hasn’t suffered any damages due to these vibrations.

6. Build Quality

The build quality of the device is amazing. It’s damn durable. I suffered a major accident on my KTM which cost around 50k in repairs for the bike. The holder suffered damages and yet the device didn’t develop any issue.

I’ve done many jumps and hard trails where the holder has come lose and the device had hit the console but even then there’s no signs of any damage to the screen or the body. The durability is impressive.

7. Camera Quality of Aoocci C5 Pro

The footage quality is very good. It’s not stabilised but the quality is plenty enough to zoom into the details if you want to use the footage for any legal purposes. Only during the night, the footage from the rear camera isn’t useful because of the glare from headlights of the vehicles behind you.

8. Automatic Connection

Once your phone is paired, you don’t need to manually connect it again. Just switch on the ignition and within 20-30 seconds, it’ll connect to your phone and maps will be loaded.

Cons of Aoocci C5 Pro

Now for this price, I should not complain about anything given how useful the product is. But here are some points I wish were better.

1. Colour Infringing

The smaller font on the display often has some colour infringing especially the white ones. This isn’t a major issue. The main headings and highlights are easily readable but the smaller details on the map are often difficult to read because of this issue. Again I’m just nitpicking here and it isn’t a deal breaker.

2. TPMS Delay

When you change to the TPMS window, the pressures displayed are the readings taken prior to the last time ignition was switched off. It takes few minutes for the sensors to pick up the readings when you switch to the TPMS screen.

3, Car Navigation Only

Since it’s a CarPlay device, it supports only the car navigation option on the bike and not the two wheeler option. Here you have to be careful since the maps may take you to expressways where bikes aren’t allowed.

4. Navigation

If you start navigation on the device and if you switch off the device, it doesn’t start up the navigation automatically the next time you switch it on.

But if you start the navigation on your phone, the navigation resumes on the device even if you switch off and on. That’s one minor niggle especially when you take breaks in between your journey.

Cost of Aoocci C5 Pro

The C5 cost me around 13500 INR. I got it on a discount from the site. I think now it costs around 16k INR but I think even for that price it’s a bang for the buck product.

It’s shipped from China so it’ll take a week to get here. They’ll contact you in between via whatsapp to send your PAN or Aadhar details for KYC during customs clearance.

Should you get the Aoocci C5 Pro?

IMO, everyone who tours on their bike and who wants to save the phone from any damage should consider this. They have a model which just has the CarPlay screen but I’d highly recommend getting this particular one with the camera and TPMS.

Considering all the scams going on, I think it’s always good to have a dashcam on your bike and I don’t need to tell you the advantage of having TPMS when touring.

All in all I highly recommend this product and it has made my life a hell lot easier on my bike.

I hope I covered all the highlights of this product. If you have any doubts, shoot them in the comments section below. Get yours here – Aoocci C5 CarPlay

Cramster K2K Gloves – The Best Budget Gloves For Touring

Best budget full gauntlet riding gloves for touring Cramster k2k gloves long term review

It’s been a year using the Cramster K2K gloves and here’s my review on it.

I’ve been a Cramster fanboy for a very long time. The very first riding jacket I got 8 years back was from Cramster and I still use it to this day. I used their street gloves for 4 years.

Sadly the Company shut down in between until recently when Rynox revived their brand again. So till last year I was using the Rynox AIR GT gloves for all purposes. It’s served me well and I have retired it for city and off road use now.

I upgraded to the Cramster K2K gloves just before my Ladakh trip in September 2024 and I’ve been very happy with it.

Pros of Cramster K2K

1. Features

For the price, it packs a lot of features. Full leather construction, TPU protectors for knuckles, scaphoid sliders, touchscreen compatibility, dual adjusters and so on.

2. Comfort

It’s very comfortable to wear and the break in time required is very less.

Cons of Cramster K2K Gloves

Not Waterproof

The only downside to these gloves I’ve noticed is that it’s not waterproof so you can’t use it in rainy conditions.

Cost

It costs around 5k INR and is available online or in Rynox stores. If you’re looking for a full gauntlet gloves for touring, these gloves will do the job perfectly.

Get yours here – Cramster K2K

YouTube player

Best Budget Boots For Touring – Gadsyll Tourer Boots Review

Best budget boots for touring on your motorcycle Gadsyll Tourer boots long term review

It’s been a year and a half using or even abusing these Gadsyll Tourer boots and here’s my review on it.

Until last year I was using the RE Huntsman boots for over 4 years for touring. The only downside to it was it wasn’t waterproof. So every every rain and water crossing, I had to use a shoe cover.

When I started riding the off road track more often, I decided to get a waterproof boot. I got the Gadsyll G star 11 tourer boots and it’s been great.

Pros of Gadsyll Tourer Boots

1. Durability

These boots are highly durable. These are meant to be used for touring but I use it for my dirt track practice sessions like a motocross boot.

It has endured many hours of abuse on the track. I used it for my entire Ladakh and Kashmir trip as well. It hasn’t suffered any damage yet.

Few times during track practice, the bike has fallen on top of my foot and yet my feet has remained safe.

2. Water resistance

These boots are perfect in keeping your feet dry. Many times after track practice, there’ll be a lot of mud stuck to the boot and bike.

Those days after practice, I go straight from the track to a car wash and pressure wash the bike and the boots while I’m wearing them and no water gets inside. Once on the way back from Ooty when it rained for hours, it never allowed water to seep in.

The only time water got in was during a water crossing in Ladakh where I had to put my foot down in the middle of a water crossing and the water level was above the opening. The water seeped in from above. That’s the only time the insides of the boot have got wet.

3. Comfort

These boots fit perfectly and the sole is very soft and comfortable. You can’t walk around in these boots as with any riding boot but while riding they are very comfortable.

4. Cost

They are very affordable. A pair costs around 8k INR. That’s a bang for your buck given the supreme quality.

Cons of Gadsyll Tourer Boots

I have not so far noticed any cons to this boot. It’s not a stiff and purpose built one like a typical motocross boot but for what its worth, it does its job perfectly well.

I’m very happy with these boots after 1 year of usage so much so that I got a pair of smaller ones, the G star 9, for my city commute as well. Get your here! – Gadsyll G Star Tourer

YouTube player

Axor X Cross – Best Budget Helmet For Touring

Best Budget Helmet for Touring, Commuting & Off Road Riding Axor X Cross Long Term Review

Here’s why I think Axor X cross is the best budget ECE certified helmet for touring.

I’ve been using Axor helmets for over 4 years now. Up until last year I was using the Axor Apex and once I got more into off road riding, I got the Axor X Cross helmet for better field of vision.

Here are the pros and cons.

Pros of the Axor X Cross

1. Durability

How do I know it’s durable? Well I had a bad crash on my KTM 390 Adventure. I flew over the bike and landed straight on my head. The helmet visor and the beak broke while the main shell developed a crack.

I had a foot injury which took more than 2 months to heal and the bike had 48k worth of repairs. It was that bad. The helmet is the only reason I’m alive right now. It took the impact and saved my head from the impact force.

2. Cost

Axor makes the cheapest ECE 22.06 certified helmets and that’s a good benchmark of safety rating to get. Apex costs around 5k INR and X Cross around 7k INR.

3. Double D Ring

The double D ring locks are safer than the strap locks. I’ve noticed that only expensive helmets come with double D and some helmets even with ECE certification gets only strap lock.

I always go with a double D ring because I’ve had helmets where the strap lock has worn out with use or even broken on small impact.

4. Features of Axor X Cross

At this price point I think only Axor helmets are laden with features such as dual visors, pin lock which prevents fogging and space for installing intercoms. The inner lining is removable and washable too.

Cons of Axor X Cross

1. Weight

It’s heavy compared to it’s peers in the market and obviously lighter ones comes at a higher cost.

2. Wind Noise

The X cross in particular has very high wind noise but it can be taken cared of with 3m ear plugs.

3. Chin Mount

The X cross has a sharp angle at the chin which doesn’t fit most of the universal adhesive chin mounts for action camera. So I use the helmet specific chin mount form Motovibe India.

All in all I think Axor X Cross is a great helmet for off road as well as highway use. Get yours here – Axor X Cross

YouTube player

How to record your helmet intercom conversations

How to record your helmet intercom conversations for motovlogging

Seeing my vlogs, many of you had asked me how I recorded our intercom conversations while we were riding through Ladakh and Kashmir. Here’s how I did it.

So first there’s the intercom. We used the Vnetphone V6 intercom. The intercom has two speakers and a mic. Now to record the conversation, I used two different lav mics.

One of them sits alongside the intercom mic and records my voice. The other one sits on top of one of the intercom speaker and records the other person’s voice coming through the speaker.

These two mics are then connected to a headphone splitter which combines these two signals into one signal. The outout jack is connects to the mic jack of the action camera. It’s that simple.

Keep in mind, all these mics need to have a TRS jack and not the TRRS one. The TRS jack will have 2 black rings while the TRRS one will have black three rings. You’ll need to get lav mics and connectors that are of TRS type or use a TRRS to TRS converter which will make the whole setup a bit more cumbersome.

Advantages of wired helmet audio recording setup

Now there are better setups like wireless ones. I have seen some use the DJI mic paired with DJI cameras or even the intercoms like Cardo and Sena paired with DJI cameras to make this whole setup wireless but I have found few downsides to it.

Firstly that setup is expensive. A mesh intercom and a wireless mic is quite expensive. Secondly, these setups are not self healing.

I have tried connecting the insta360 X2 to the Vnetphone V6. It works but the catch is that you need to manually connect it every time you switch the camera on. It’s a hassle while you are on the move.

The beauty of this wired setup is that you can start and stop recording with a single click of a button. The intercom will be on always while you are riding. When you want to record, just start the camera. This reduces a lot of friction and makes vlogging on the go very easy.

Disadvantages of wired helmet audio setup

The only downside to this whole setup is that it’s not waterproof. I use the Cynova mic adapter for the DJI osmo and while it’s connected, the camera isn’t waterproof. So when it starts raining, I have to disconnect the adapter and put back the waterproof cover.

That’s the only downside. But in areas like Ladakh and Rajasthan, it hardly rains so you’re sorted.

Product Links – Elfog Lav Mic, Headphone Splitter

YouTube player

Vnetphone V6 – A bang for your buck intercom!

don't waste your money on expensive intercoms. here's why vnetphone v6 long term review

It’s been more than year using the Vnetphone V6 intercom and here’s my review on it.

There are many popular intercom brands like Sena, Cardo and even cheaper ones like the Bluearmor. They start at a price of 10k INR. Till last year, I had never used intercoms and I was skeptical about it. So as a trial, I got the cheapest one available, the Vnetphone V6. I got a pair for just under 6k INR.

To my surprise, it held up so good that I ended up keeping it and using it for multiple trips. So before I get into the pros and cons, here are the features of this intercom.

Features of Vnetphone V6

Vnetphone V6 is a bluetooth intercom and it can connect up to 6 other Vnetphone intercoms or 6 other bluetooth devices. It comes with 2 speakers and a mic along with the main unit and an attachment for your helmet. It has 6 buttons to connect 6 different intercoms, a volume up and down button, buttons to answer and decline calls and a switch off button.

Pros of Vnetphone V6

1. Cost

The first pro is the cost. For less than 3k INR it’s a bang for the buck product. Sena and Cardo systems start at 30k INR while the Bluearmor starts at 10k. So for having almost 90% of the functionality of those systems and costing around 1/10th of the price, it’s totally worth the money.

2. Audio Quality

The audio and signal quality is really good. I use a pair of earplugs under the helmet to cut off the wind noise. Even with those, the voice clarity is really good at 90% of the volume of the intercom. The wind noise cancellation is also great up to a 100km/hr. The person on the other side of the phone call might not even notice that you’re riding a motorcycle.

3. Range

The range of the intercom is commendable. In straight highways, the range holds up good even up to 1km. It means if you can see your riding partner at the far end of the horizon on a long highway, you can probably hear them too. The only times the signal gets messy is when you are taking corners at hill stations and there’s a mountain side between you and your partner or if you have a large truck or bus blocking you.

4. Self Healing

Even though you can pair multiple devices, you can connect only one at a time. If your riding partner is out of the range it automatically connects to your phone. And once your partner is in the range, you don’t have to manually disconnect and connect to your partner. It automatically disconnects from your phone and connects to your partner. This is very handy while on the move.

5. Build Quality

I’ve used the Vnetphone V6 extensively in all weather conditions. Even in heavy monsoon, this intercom works just fine. It’s waterproof and dust proof.

6. Battery Life

The company boasts around 12-16 hours of battery life. Now the longest I’ve used it is when we were riding from Padum to Leh which was a 15 hour ride. It never ran out of charge. And it charges from 0-100 in less than an hour.

Cons of Vnetphone V6

1. No universal connectivity

Vnetphone V6 is not a mesh intercom and hence it doesn’t connect with intercoms of other companies. It connects to only Vnetphone intercoms.

2. One connection at a time

Even though it can connect up to 6 intercoms, you can use or talk to only 1 intercom in an instance. That means if you want to talk to another intercom, you have to disconnect the current one you’re connected to and connect with the other. You cannot connect your phone and your intercom simultaneously. So there’s no music sharing or call sharing.

3. Small Buttons on the Vnetphone V6

These buttons on the intercom are so small that using them with the gloves on makes it almost impossible. But most of the time you don’t need to use these buttons. Once connected, you can forget about it. And it auto answers calls after 3 seconds of ringing so again you don’t need to use these buttons that often.

4. Long Term Durability

One of the intercom developed a lose connection after a year of usage. I think one of the speaker wire developed a cut and we had to throw it off. I guess that can happen to any headset wire but I wish it didn’t happen because the intercom still worked perfect. We even tried to get just the wiring or just an extra pair of speakers but it wasn’t available anywhere.

Should you buy the Vnetphone V6?

If you’re a team of two or if you’re a couple then the Vnetphone V6 is a perfect choice. Intercoms make the ride a hell lot more fun. It makes communication a lot easier and having conversations during long hours of riding makes the whole experience memorable. It also gives a sense of safety when you’re on two separate bikes because you can be on the constant look out for each other.

Or if you ride solo, this intercom works great in enjoying music or a podcast while riding. It can also make calls with good clarity.

If you ride in larger group, you would want to look for a mesh intercom like Bluearmor where you can connect with multiple riders at once.

Buy it here – Vnetphone V6

YouTube player

Easy Clutch Review – Make Your Himalayan Feel Like A Honda!

Make your Himalayan feel like a Honda! Easy Clutch from Pro Spec Long Term Review

Two years ago I purchased the Easy clutch from Pro Spec after seeing an ad. Even though it reduced the clutch action as they had advertised, it came with a lot of issues. The gear shifts were hard and the clutch was not engaging/disengaging fully. So after using for few weeks, I went back to the stock clutch.

When I posted on the accessories that I’ve put on my Himalayan, I had mentioned that it didn’t work for me. Seeing that post, Mr Madan from Pro spec reached out to me and said that they have a newer version which takes away all those issues and he welcomed me to try it out. So I went to their office in Bangalore and installed the new cable system.

Post the installation, Mr Ajay from Pro spec helped me in adjusting the lever action. So it’s a bit tricky and not like how you’d adjust the stock cable. I’ll walk you through it.

How does easy clutch work?

The Easy clutch works by a lever mechanism inside the unit. So there’s a short cable that comes from the lever to the unit and a long one that goes from the unit to the gear box. They recommend not having any free play in the lever as opposed to some free play in the stock lever. To adjust that, you’ll need to use the adjusters on the unit.

If you want to eliminate the free play and increase the clutch lever action, you need to unscrew and expand these adjusters and if you want to decrease the lever action you have to screw in and collapse these adjusters. The clutch engagement/disengagement falls in the middle 50% of the sweep. So you’ll need to keep 25% of the sweep in both the extremes free from engagement/disengagement.

How does the it perform?

Once I got the adjustment done, I realised the clutch makes a hell of a difference. The action is so light that you’ll feel like you are riding a Honda bike. It makes city commute much easier. I used to take my Himalayan only on the weekends and use my friend’s Suzuki Access for city commute mainly because of the hard clutch on the Himalayan. But now I’ve almost stopped using the scooter for city commute.

Gear shifts are also very click and precise. You’ll need to get used to the feel at first since the clutch now has more sweep than the stock setting. So getting adjusted to the level of engagement/disengagement of the clutch in the sweep takes some time but you’ll quickly learn it. And once you do, trust me there’s no going back to the stock cable ever.

I thank Mr Madan, Mr Ajay and the entire team of Pro Spec for listening to the feedback and improving the product. I really appreciate them reaching out and helping me getting it installed and working perfectly. It costs around 3000 INR and it’s bike specific so contact them before placing your order. I’d highly recommend the Easy clutch for making your life easier on the Himalayan 411.

Go check it out here – Easy Clutch Pro Plus

YouTube player

Mototorque Crash Guard for Triumph Scrambler 400X & Himalayan

Tried & tested crash guards for Triumph Scrambler 400X & RE Himalayan 411

I installed the Mototorque crash guard and removed the stock engine guard on the Triumph Scrambler 400X. Why did I do it and how does it perform? Let’s get into it.

The stock leg guard and the lower engine guard on the Triumph Scrambler 400X is very functional. The build quality is great and it does a great job in protecting the engine in case of a fall. However there was one issue that we faced with it when we started taking it off road, on trail rides and dirt track practice sessions.

The stock engine guards sits close to the frame. And hence on multiple occasions, the bike fell over rider’s leg and it used to get stuck in between the engine guard and the ground. The leg wouldn’t get crushed but the foot would be stuck on the other side. It’d completely immobilise the rider and they can get out of the situation only if someone lifts the bike and then they can drag their foot or leg out of the situation.

When this happened a couple of times, we were on the look out for alternatives. That’s when we came across the crash guard made by mototorque. Before fixing it we went to their office and checked it out. Now it’s been more than 5-6000 kms riding with it so here’s my review on it. Long story short, it’s so good that i got one for my Himalayan too.

Pros of Mototorque Crash Guard

1. The Sliders

Mototorque crash guard comes with a big enough slider. When the bike falls, the slider is the first thing to come in contact after the handlebar. This creates a large enough gap between the flat ground and the bike to a point where you can pull out your foot by yourself instead of having someone lift the bike. This feature was the main one that made us go for mototorque crash guard.

The second advantage of these sliders are that in case of a bigger impact, these bolts that holds the sliders in place absorbs the impact and bends out of shape. And thus it prevents the full force from getting transmitted on to the chassis. This happened in our trip to Ladakh as well. All that was needed was to remove the bolt and replace it with a new one and we were good to go. And in case the slider gets severely damaged, you’ll get fresh ones from Mototorque.

2. Build Quality

The fit and finish of these crash guards are great. The powder coating on these match the quality of the chassis on the Scrambler 400X and hence these won’t feel out of place with the bike.

Cons of Mototorque Crash Guard

I don’t consider this as a con at all but some say these rigid 3 point mounting crash guards will transmit forces to the chassis and will break the chassis. To all those people I just have one thing to say. You can spend money and replace a chassis. No amount of money can completely replace a fully functioning femur or a tibia. So for me, our limbs are more important than anything else.

With that being said I’m totally against all the cage like crash guards that are actually a hazard in most of the cases. They cause more harm than good. But this particular one from Mototorque strikes a perfect balance in not being too much but just enough to give a little extra protection than the stock one.

On the Himalayan, I installed the crash guard that’s made for the Scram 411. Mototorque has a separate one for the Himalayan but i think it’s an overkill. This particular one for the Scram 411 fits perfect and is just enough for the Himalayan 411 as well.

Also another accessory that I forgot to mention in the other post is the side stand extender from Mototorque. This is a great help when going off road and when you go on tours. This prevents the bike from sinking in when it’s parked on sandy or muddy terrain especially when it’s loaded with luggage. We got it installed for both the Scrambler 400X and the Himalayan and it was of great help during our Ladakh trip.

Product Link – Mototorque Crash Guard for Triumph Scrambler 400X, Mototorque Crash Guard for Scram 411, Mototorque Side Stand Extender for Triumph Scrambler 400X, Mototorque Side Stand Extender for Himalayan 411